« December 8, 2025 - December 14, 2025 | Main | December 22, 2025 - December 28, 2025 »
Saturday, December 20, 2025
It’s Beginning to Taste A Lot Like Christmas
One of the things that make Christmas christmasy for me is the food. Somehow Christmas just doesn’t feel like Christmas without certain epicurean experiences. And it’s not the savory foods that do it for me – no, I do not think about baked ham or roasted turkeys. Christmas for me is defined by all the sweet treats of the season. (Yes, my sweet tooth is quite legendary in this family). Weeks before Christmas I would start dreaming of fruit cakes, mince pies, chocolates, cookies and what have you…
This year, the festivities have had a rather late start for me. I have been too busy to do hardly any Christmas baking. My fruit cake attempt a couple of weeks ago could hardly be called a “resounding success”. But… all is well…
A friend of my brother made us a brandied fruit cake, and it is delicious! It isn’t too sweet (hard to find in commercial ready-made fruit cakes), has a nice, tender crumb and is moist with a balanced taste of brandy. It has a nice homey feel to it – simply decorated, without glazing etc. Our family doesn’t like glazed cherries in or on our fruit cakes, so this suits us to a T.
Apparently, she takes orders for her cakes, which she bakes part-time (over and above her full time job). She does all sorts of cakes from butter cakes to cheesecakes, and is also supposed to have come up with some interesting creations like tequila cakes and vodka cakes. I’m curious and am awaiting a list of her cakes from my brother, so that I can try out some of her other creations. I like her style of baking (and I’m not just saying this because she is known to my brother), and her prices are rather reasonable. I think her fruit cakes go for S$28 for a 6-8” cake, compared to easily $40+ to $50+ from shops.
Anyway, if anyone is interested in contacting her for her cake list or to place an order, please drop me a line, and I’ll pass you her contact number. Okay, yes, this is a mini 30-second plug... but we do like her fruit cake very much. And good things should be shared ; )
Whilst shopping at Cold Storage supermarket the other day, I picked up a box of Tartufo Italian Christmas cake (S$14.90). Each year, I’ve seen these Italian cakes on sale, but have never been tempted to try them, until now. I wasn’t sure what to expect. In fact, I have always associated “tartufo” with Italian gelato for some reason. The fine print on the box said “Italian leavened cake with gianduja hazelnut paste, coated with plain chocolate and decorated with chocolate curls”.
When I opened the box, this was what I found… it looked suspiciously like an extra, extra large muffin!
(Note my first – not very successful – attempt at mood lighting photography. Haha!)
The inside revealed nice, slightly gooey chocolate cream filling, with the lightest hint of the liquor. The texture of the cake had looked rather coarse and dry , but it tasted tender and fairly moist. I actually feel it is more inclined towards being a rich, sweet bread rather than a cake.
I wonder… is this a traditional Italian Christmas cake? Or is this a modern invention? I’m really curious about the story and tradition behind these sorts of Italian Christmas cakes… I’m presuming it is fairly authentic as it is made in and imported from Italy. Anyone knows? I’m always fascinated by the different foods eaten in different cultures to celebrate the same festivity.
I’m also really curious how this cake/bread can keep for so long. It came non-vacuum sealed in a paper box and the expiry date on the box said May 2004! ![]()
It was nice though. I liked it. I would like to try some of the other varieties next year. I think there must have been at least 5-6 varieties, with different cream fillings or toppings, that I saw on display the other day.
The cake also came with a complimentary cute little mini Panettone – Italian leavened cake with raisins and candied orange peel.
I would guess this is the original Italian Christmas sweet loaf? And the counterpart to the German-originated Stollen. I’m more familiar with this German version of a sweet, rich, brioche-like, fruity, spicy bread/cake with a marzipan center. The tradition of eating Stollen at Christmas apparently arose from the ancient practice of the local bakers’ guild of the city of Dresden’s to present to the Bishop of Narumburg two long white breads, called “Stollen”, on Christ’s birthday and on Michaelmas. I think the characteristic oblong shape of the Stollen with a folded ridge down the center is supposed to represent the Christ Child in swaddling clothes.
The Italian Panettone is quite differently shaped. Is there a significance to this? What’s the tradition behind the Panettone? Strangely, I don’t think the English have a tradition of eating sweet breads at Christmas. I only remember and know of plum puddings with brandy sauce, rich fruit cakes and of course, my favorite, mince pies. One is supposed to eat one mince pie a day on each of the 12 days of Christmas (from 25 December through to 5 January, before the epiphany on the 6th), to ensure one has good luck in each of the coming 12 months of the new year. Interesting, huh?
Ah… fruit cake, Panettone and mince pies… it really is beginning to taste a lot like Christmas!
03:56 AM in Festivals: Dong Zhi & Christmas 2003, Lion City Shiok-Eats: Cakes & Desserts | Permalink | Comments (8) | TrackBack
Meat Balls For Alberto

I like to use these meat balls in a lot of the dishes I cook. They are so convenient. They come fresh, ready-prepared in vacuum sealed packages from the supermarket, and they instantly add taste, texture and “meat” (pun intended) to any dish. I add them to noodle soups, rice vermicelli soups, tau kwa (pressed tofu) dishes, fu jook (bean curd stick) dishes and many, many more. Even instant noodles, with an additional egg. Yum!
I actually prefer these meatballs anytime over the ubiquitous fish balls that are so very common in Asia. They have “more bite” with a “springier” texture than fish balls. And they come in nice ¾” bite-sized pieces, which also make them great for skewering into sort of meat ball satays, then cooked over a BBQ or under a broiler, and either basted with teriyaki sauce, served with salsa or dipped into piquant chilli sauce. There are increasing varieties of them too – beef balls, chicken balls, sotong (squid) balls, beef and mushroom balls, chicken and mushroom balls, sotong and mushroom balls, and even tofu and fish balls.
Here’s a dish that appears regularly on our family’s dinner table – a mixed dish of meat balls, cubes of teriyaki tau kwa (pressed tofu in teriyaki flavor), cubes of fish tofu, different types of mushrooms, carrots, long beans and red chilli. I like this dish a lot!

02:10 AM in Home Cook: Poultry & Meats | Permalink | Comments (2) | TrackBack
Friday, December 19, 2025
Silken Skin

I remember as a young girl, whenever I refused to eat fu jook (bean curd skins) or fu jook pei (dried bean curd stick), my paternal grandma would always tell me that eating fu jook would make my skin as silky smooth and fair as the fu jook. And if old wives’ tales are to be believed, eating lots of fu jook tong shui (bean curd skins sweet soup with gingko and lotus seeds) whilst pregnant would produce a baby with silky smooth skin and complexion!
While I’m not sure such bribery worked on me as a child, I have grown to love eating fu jook and all its variants. Fu jook is made from the “skin” that forms on the surface of heated soy milk. These are scooped up and either sold fresh to be used in making sweet dessert soups like fu jook bak guo tong shui (bean curd skins with gingko sweet soup), or are dried into sticks and used for many types of savory dishes. (Linked pictures are taken from Cook’s Thesaurus).
I love the fu jook dish my mum cooks. It’s chock-full of ingredients, with different tastes, textures and colors. The recipe involves a fair number of ingredients and quite a few different steps to prep all the different ingredients, before actually cooking the dish.
The main ingredients of the dish are: fu jook pei (dried bean curd stick), black wood-ear fungus, carrots, diced chicken meat, tang hoon (mung bean vermicelli), quail eggs, red and green chillis, cilantro or parsley. Occasionally, she may also add mushroom meat balls, fish balls, sotong (squid) balls or cubes of fish tofu. That’s what I like about this dish… the ingredients can be added to, substituted or changed to vary the flavors of the dish.
First, the dried bean curd sticks have to be prepared. They are soaked in water for at least 4 hours. After which, they are quickly sautéed (not deep fried) in hot oil. This is to prevent them from disintegrating when they are cooked in the main dish. They are then rinsed in running water to wash away some of the oil from the sautéing. Next, they are put into boiling water and allowed to “boil” for about 10 minutes. Once drained, they are ready to be used.
Similarly, for the dried black wood-ear fungus, these are also soaked in water then rinsed well to remove all soil and dirt. Again, they need to be boiled for about 10 minutes before being drained and set aside to be used in the main dish.
The quail eggs are hard-boiled and peeled.
The red and green chillis (seeded and de-veined) are sauteed in a little hot oil with a little minced garlic and shallots beforehand.
The diced chicken meat is marinated with a little light soy sauce, sesame oil, sugar and a bit of cornflour. Next, it is sautéed in a little hot oil, until partially cooked through. 1 teaspoon of dark soy sauce is added before it is set aside.
Now for the dish proper… minced garlic and shallots are sautéed in hot oil until softened and fragrant. The carrot slices are added, followed by the wood-ear fungus. Seasonings of around 1 tbsp light soy sauce, 1 tbsp oyster sauce, 3 tbsps rice wine and pepper are added. (Note: these quantities for the seasonings are for a BIG batch of the dish, and should be adjusted accordingly). Next, the chicken stock goes in, along with the dried bean curd sticks. More seasonings are added: 4 tbsps light soy sauce, ½ tsp sugar, 2 tbsps oyster sauce and 1 tbsp dark soy sauce. According to my mum, adding all the seasonings before adding the stock would lead to overly salty carrots and fungus, whilst doing it in two stages leads to a dish with nicely balanced flavors. The quantities for the flavorings may look like a lot, but it doesn’t produce a salty dish at all. My family is almost hyper-sensitive to saltiness. In Chinese restaurants we are constantly requesting for “less salt” in all our dishes. And this dish tastes just fine.
The tang hoon goes in next. The stock is allowed to come to a boil, before letting it simmer for about 15 minutes, uncovered. The last stage is to add the partially cooked chicken, hard-boiled quail eggs, chillis, and any other ingredients (eg mushroom meat balls etc) that are to be added but do not require much cooking time. The last to go in would be the cilantro leaves. The mixture is then brought to a boil, and a little cornstarch solution is added to thicken the gravy. After it comes to a rolling boil again, it is removed from the heat and served.
All that effort is worth it though… it tastes great, and even better the next day! Yum!
03:10 AM in Home Cook: Soy | Permalink | Comments (4) | TrackBack
Split Personality Bread Pudding

The other day, while sorting through a cookie tin full of old recipes that I had copied from various places and scribbled onto scrap pieces of paper, I came across one for bread pudding. I love bread pudding. So does my family. And since we haven’t eaten any for a while, I thought I would try my hand at making one. The weather this past week has also been perfect for bread pudding. There’s nothing quite like eating warm comfort food on a cool rainy day.
I have never made bread pudding before. Yes, another first. Hmmm… it has been a week of kitchen firsts hasn’t it? The recipe looked really simple and it was. It was just a matter of soaking cubes of slightly stale bread into a custard mixture of brown sugar, eggs, evaporated milk and fresh milk.
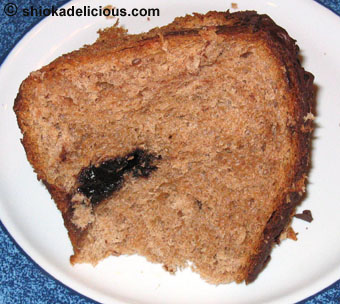
As usual, I wanted to experiment with different tastes and had a hard time deciding what exactly I was going to do. I wanted to make a bread pudding using raisin cinnamon bread, and I also wanted to try white bread with toasted almond flakes. But I didn’t want to make two bread puddings. So, I made one – with both types of bread. A sort of split personality bread pudding I guess.
For the custard: ½ cup (I think I would prefer slightly less the next time) packed brown sugar was whisked together with 2 eggs. Then, 1 cup of low fat (1.5%) evaporated milk and ½ cup 1.5% fresh milk were added, together with 1½ teaspoons of pure vanilla extract, and whisked to mix. I decided to skip the cinnamon and nutmeg that the recipe called for, as the raisin bread already had cinnamon and I wanted to see what the white bread would taste like without these flavorings and just almond flakes. But of course, I then promptly forgot to add the almond flakes to the white bread mixture!
I divided the custard/pudding mixture into two and added one type of bread cubes to each. (4 cups of bread cubes in total). These were left to sit for about 5 minutes, before going into a 175C oven for 50 minutes, or until the bread has puffed up and turned a deep golden brown. Mine was done in just over 45 minutes - the skewer inserted into the center already came out clean. The bread was a gorgeous golden brown.
I walked away to get my camera to take a picture of the beautifully puffed up pudding. On the way, I stopped to take care of something. I returned to the kitchen 5 minutes later to find that the entire pudding had “sunk” !! Horrors! What happened?! Are bread puddings supposed to do that?? Or maybe I should have left it in the oven to cool slightly first before removing it. Perhaps my impatience caused the “collapse”. Have to find out what happened there…
Regardless, it tasted pretty good. I sprinkled the forgotten almond flakes onto the white bread pudding before serving, and that was very good! Strangely though, the white bread pudding tasted sweeter than the raisin bread pudding. I wasn’t expecting that. If anything, I would have thought the latter would come out sweeter, as the raisin bread is in itself sweeter than the white bread.
Bread pudding on a rain-soaked day… what could be better? ![]()
Happy bread pudding-ing! ![]()
[Update (23/12/03): It just occurred to me that a possible reason why the bread pudding "sunk" after being removed from the oven is that I didn't place the casserole on a baking tray filled with about 1" deep of water, before putting it into the oven. I think a lot of bread pudding recipes call for such a step. For some reason, the recipe I used did not - or maybe I had scribbled it down wrongly way back when...
I'm thinking also that placing the casserole in a shallow water bath so to speak would create a different (more custardy?) texture, rather than a more kueh-like (cakey) texture.
Not sure if the baking time would need to be adjusted if using the water bath. It should either be the same or maybe just a few minutes longer (?)
I'll have to try the recipe again to find out...]
12:21 AM in Comfort Food | Permalink | Comments (8) | TrackBack
Thursday, December 18, 2025
Lobster, Lobster, Lobster

We had lobsters for dinner tonight. ![]() They were done very simply… A LOT of minced garlic, some minced red chillis, some minced spring onions (scallions), salt and pepper, combined with softened butter, and spread over the lobsters. They were popped under the broiler for 8 minutes. That’s it. The flavors were nice without being over-powering, allowing the natural sweetness of the lobsters to come through. The lobster flesh was sweet, juicy and succulent… a sublime mid-week treat!
They were done very simply… A LOT of minced garlic, some minced red chillis, some minced spring onions (scallions), salt and pepper, combined with softened butter, and spread over the lobsters. They were popped under the broiler for 8 minutes. That’s it. The flavors were nice without being over-powering, allowing the natural sweetness of the lobsters to come through. The lobster flesh was sweet, juicy and succulent… a sublime mid-week treat!

I’m already brimming with ideas for the other lobsters now in the freezer (all courtesy of my dad!). I can just imagine...
• Lobsters sautéed with wine, ginger and scallions
• Lobsters sautéed with black pepper
• Lobsters sautéed with black bean paste
• Chilli lobsters (a la chilli crabs)
Urgh… choices, choices…
But three cheers for dad! Thanks for the lobsters! ![]()
01:51 AM in Home Cook: Fish & Seafood | Permalink | Comments (2) | TrackBack
Going Potty Over Pot-Pie

On Tuesday, I decided I wanted to try my hand at making a vegetable pot-pie. Now, I’ve never, in all my life, made a pot pie before. On top of that, I’ve never made a savory pie before. Hard to believe, I know, but it is true. Okay, so what could be so difficult about a pot pie right? It’s just a pie baked in a deep casserole dish, with only a top crust, and no dough base. Plus, I’ve made dessert pies before, so the basics are pretty much the same for a savory pie. Should be simple enough. But of course, Renee has to go make life even more interesting (difficult??) for herself… she decided that she was going to try to make a savory pot pie with a biscuit crust. How’s that for jumping in at the deep end?!
I am referring to the American biscuit, not the English… i.e. those scone-like baked items that are sometimes called “Southern Biscuits”. I have never made biscuits before. Not even sure if I have ever eaten one (at least an authentic one). Which means I don’t even know what a biscuit should really be like. And here I was contemplating using that as a crust for my pie!
I have been very tempted to try baking biscuits ever since I read Deb’s post on her attempt at making them. Hers had looked absolutely delectable. Plus, the other day, whilst waiting for someone and flipping through a stray magazine, I had chanced upon a recipe for a pot pie with a biscuit crust, and it looked wonderful. So that did it… I would combine two things that I wanted to make into one. I thought I was being so clever… haha… little did I know of the adventure (or more precisely, misadventure) that awaited me…
The vegetable filling was fine. It turned out really well in fact, with the family giving it the two thumbs up.
I just took whatever vegetables I could find in the fridge and which would give a nice balance of colors, and diced them into equal sized cubes for ease of cooking. I ended up using 1 large onion, ½ large red bell pepper, 1½ yellow-fleshed potatoes (I decided against using Russets, as I wanted something firmer fleshed and not fluffy), 1½ carrots, small flower of broccoli, 1 stalk celery and a medium bunch of cilantro / coriander (interchangeable with parsley).
I sauteed 2 cloves of minced garlic with the diced onions in hot oil until slightly softened, before adding the potatoes, carrots and broccoli. When they were just about to start becoming tender, I added around 2 cups of chicken stock (I wasn’t trying to make the dish vegetarian, so I didn’t bother with vegetable stock), and the seasonings.
Right up to the last moment I was vacillating between making the pie filling Asian or Western. I just couldn’t make my mind up. Finally, when the moment arrived for the seasonings to be added, I opted for Asian. I mixed together Chinese rice wine, hoisin sauce, sesame oil, light soy sauce, sugar and ground black pepper, before adding it to the vegetables. I can’t for the world of me remember the quantities I used of each seasoning. I was just tasting and adjusting as I added. So, these are very approximate, recalled from memory (which is far from reliable!). I think it was around 3 tablespoons of wine, 4 heaped teaspoons of hoisin sauce, ½ tablespoon sesame oil, maybe about 6 (?) teaspoons light soy sauce, 1 teaspoon sugar and a very, very generous shake of ground black pepper.
The vegetables were left to simmer for maybe 5 minutes or so. The bell pepper and the celery were then added, and allowed to continue simmering for only another 2-3 minutes, as I wanted all the vegetables under-cooked so that they could finish cooking in the oven.
After bringing the vegetable mixture to a rolling boil, I added around ½ cup of water dissolved with 2 tablespoons of flour, to thicken the filling. As soon as the vegetables came to a rolling boil again, I removed the heat, and stirred in the cilantro. Placed everything into an 8” casserole dish and put it aside. The filling was done.
Now, for the exciting part… the crust... I had dug out a very old recipe for sweet potato biscuits that I had copied from somewhere yonks ago, but never tried. It looked really simple… I combined together 1½ cups flour, 1 tablespoon baking powder and ½ teaspoon salt. Next, I rubbed in 3 tablespoons of softened butter to form coarse crumbs. So far so good.
Separately, I combined ¾ cup cooked and mashed sweet potato with ¾ cup 1% milk, and gently whisked till smooth. This was added to the flour/butter crumbs mixture. Then, the nightmare began…
The instructions had said to mix the milk mixture with flour/butter mixture to form a soft ball of dough. Ha! What I got was this mushy thing that looked nothing like dough. It was sticky, wet and messy. There was no way I could roll this out. Perhaps the sweet potato had been cooked too long and was too soft. Perhaps I failed to take into account the humidity and moisture in the environment (it had been hot and humid in the early part of the day, then it had rained throughout the afternoon), which probably affected the amount of flour that was necessary. And also most definitely, I had no idea what kind of texture I was really supposed to be looking for in a biscuit dough. But I had to save it somehow… otherwise there would be nothing to eat for dinner!
So I added a bit more flour and tried to get it to resemble something that looked remotely like soft dough. I got there in the end… but it had very obviously been worked too much, and I already knew it wasn’t going to rise. But I was at least hoping it wouldn’t be so hard as to be inedible. Perhaps, just perhaps, fingers crossed, it might hopefully come out something close to a normal pie crust??
Popped the pie into a 425F / 220C oven for their 20 minute bake time and hoped for the best.
Well, the dough rose… ever so slightly. It wasn’t totally flat (thank goodness!). But it was definitely not what I would call a biscuit crust. Still, it tasted good with the pie filling, or so the family said. But family is always supportive, kind and diplomatic! To be honest, I was expecting a lot worse. I had visions of everyone having instant cup noodles for dinner! The filling was yummy, the crust wasn’t too bad – just a little under-salted. And I liked the color of the crust – the orange tinge from the orange fleshed sweet potatoes was just what I had wanted. I chose not to use the yellow fleshed variety of sweet potatoes as I had wanted to see what interesting color the crust would turn out like.
So note to self… lessons I should take away from this whole escapade:
• NEVER try out a new dish for a main meal like dinner, when a failure would mean many hungry stomachs!
• DON’T try to cook more than one new dish at a time, even if it is two new dishes combined into one.
Other notes:
• Add a little more cilantro the next time. I just love how it lifted the flavors of the filling, and the way the flavors melded after being baked for 20 minutes.
• Probably add a little more flour to thicken the filling – 3 tablespoons instead of 2. The family would have preferred the filling more “thickened”.
• Salt the dough more.
Okay, I’m on a mission… I will make nice, risen, flakey, scrumptious biscuits… one day…
01:14 AM in Home Cook: Savory Pies | Permalink | Comments (0) | TrackBack
Tuesday, December 16, 2025
Mango Tango

I have been experimenting with mango salsas over the last couple of days. Yes, we are still (valiantly) trying to eat and use up all the mangoes that came off the two trees in the garden over the last few weeks. I thought I would take up a suggestion Wena gave me and use it with fish.
The idea was to make a Thai-style mango salsa. After all, mangoes are an integral part of Thai cuisine – they are used raw in salads, added to cooked dishes and are a popular ingredient for Thai desserts. The sweet and tangy flavors of mangoes are a sublime match for the sweet, sour, salty, spicy tones of Thai food. I wanted to create the sweet, sour, tangy flavors, maybe with a slight Chinese touch, and match it with a simple steamed or fried fish. It had to be quick, it had to be easy. I also decided I would prefer a salsa with some “gravy” to it, rather than a standard “dry” salsa.
Japanese cucumber (unpeeled), onion or shallots (I tried both, and both work very well, with just a slight difference in sweetness between the two) and carrots were cut into thin strips. These were combined and soaked in a marinade of vinegar, salt and sugar. The vegetables were left to marinade for a good few hours, to allow all the flavors to meld. Just before putting the salsa together, some sweet Thai chilli sauce was added to the vegetables.
The mangoes were also cut into thin strips, and set aside. I didn’t want to add this to the vegetable marinade as I suspected the mangoes might go too mushy from sitting in the vinegar. Also, I wanted to keep the taste of the mangoes very pure.
Separately, some Chinese plum sauce (approximately 6 tbsps?) and a little hot water was put into a frying pan, and seasoned with Thai fish sauce (nam pla) to taste. As the sauces came to a boil, a little cornstarch solution (cornstarch dissolved in a little hot water) was added to thicken the sauce to the desired consistency. Once the sauce came to a boil again, it was removed from the heat and the vinegar-marinated vegetables, together with the mangoes, were added and mixed well .
The colors were beautiful – vibrant yellow mixed with green, white and orange, with specks of red from the chilli sauce. On hindsight, perhaps I should have also added strips of fresh red chilli for even more vibrant colors. I had been wary of making the salsa too spicy, but I think it would have been fine with some chilli strips, adding a different layer of flavors on top of the chilli sauce seasoning. In fact, I should have added more chilli sauce than I did.
I served the salsa on both steamed and pan-fried whole pomfret. I would have preferred using fish fillets, but I didn’t have any in the freezer. I think the salsa probably worked better with the pan-fried fish than the steamed. Either way though, the flavors were great! Very appetizing… tangy, sweet and very slightly spicy. Really shiok!
Another idea occurred to me… this would work great with deep-fried battered fish nuggets or fish fillets (a la fish & chips). I think a beer batter with this might be interesting or a Japanese tempura-inspired batter would be nice too. And instead of a “watery” salsa, I would dice the vegetables, marinade them in the vinegar mixture, add the chilli sauce, plum sauce and fish sauce (but no water), before adding them to plain yogurt, and using it as a dip.
Hmmm… well, there is still half a carton box of mangoes sitting in the pantry… and they do have to be used up before they become over-ripe... hahaha… I think the family could be quite sick of mangoes by the time I’m through! ![]()
Happy mango tango-ing!
02:52 AM in Home Cook: Fish & Seafood, Home Cook: Light Touches | Permalink | Comments (2) | TrackBack