Sunday, September 19, 2025
IMBB 8 – Part II: Boozy Potatoes
Yes, I know. I served up dessert (IMBB 8 – Part I) before the savory course. But that’s not too unusual, given how much I love desserts and how, when dining out, that is the section of the menu I always peruse first, before making any decisions about what I will order for the rest of my meal!
This dish wasn’t a planned IMBB entry; it just sort of happened. On Friday evening, I was flipping through my newest gem of a cookbook find, “The Breakaway Japanese Kitchen” by Eric Gower. [This is a very interesting and lovely cookbook ; almost all the recipes sound and look tempting, and also seem incredibly simple to execute. The fusion food angle is very subtle and fine-tuned; nothing ridiculous – no wild and unrestrained dumping together of any and every ingredient into a frenzied marriage of East and West. It’s not fusion for the sake of fusion; Gower seems to have an innate understanding and sensibility about Japanese cooking which comes through. And he does a good job of coupling this with his Western culinary background. I’m really enjoying this book – especially now, after I’ve tasted the results of this potato recipe.]
Anyway, as I was saying - I was flipping through the book, looking for general food ideas and inspiration, when I came across this page. The title leapt out at me: Boozy Japanese Potatoes. Now, how could anyone not stop and give their undivided attention to a heading like that. The picture was gorgeous. The recipe sounded wonderfully easy, simple and incredibly tasty. I just had to try this. I decided this was what I was going to serve up for Sunday brunch. It was only as I was cooking the potatoes that it occurred to me that this was absolutely perfect for this month’s IMBB. And thus, this bonus post - on top of my original IMBB entry of the “spirited” chiffon cakes.
These potatoes are sooooo incredibly tasty. Really lip-smackingly good. They taste even better than they look in the photos. They’re also truly very boozy! A substantial quantity of sake is used for not very many potatoes; and that’s what makes this dish a stunner. The delightful burst of sake flavors that comes with each bite is powerful yet delicate, dominant yet restrained and subtle; the balance is fine-tuned and… just perfect.
This recipe is so easy and simple to prepare, and the end flavors belie that ease and simplicity. I can definitely see myself making this time and again – not just for brunch, but as a wonderful accompaniment for all sorts of meat and fish dishes.
Boozy Japanese Potatoes
[adapted from The Breakaway Japanese Kitchen – Eric Gower]
Serves 2
2 medium-large potatoes *
2 tablespoons extra virgin olive oil **
1 cup sake ***
2 to 2½ tablespoons light soy sauce
1 tablespoon butter
* The firmer, yellow-fleshed potatoes work best (I used Dutch yellow potatoes), as they hold their shapes better and do not break apart so easily.
** Or any other vegetable cooking oil, if preferred.
*** I don’t think this has to be top notch, expensive sake; any drinkable sake will do.
• Bring a large pot of water to a boil.
• Scrub and peel the potatoes, and cut them into 10 or 12 pieces each (depending on size of potatoes).
• Add them to the boiling water and cook for about 10 minutes. [Do not overcook; they should be somewhat tender and yet still have some firmness and bite to them. They will be cooked for a further 15-20 minutes later, and you don’t want them disintegrating on you and becoming a mushy mess.]
• Drain well.
• Heat a large nonstick skillet. Add the oil, then the potato pieces. Move them around so that they are all nicely coated with the oil. Cook on high heat for about 5 minutes, sautéing occasionally, until they are lightly browned.
• Pour in the sake (this will create a right noisy sizzle; it’s okay – there’s no real danger here). Continue to cook on high heat for about 5 minutes, tossing and stirring the potatoes frequently, until the sake almost disappears. [When you first add the sake, it will look excessive – as if the potatoes are swimming in the stuff, and you’re boiling or simmering the potatoes rather than frying them. Not to worry; it’s fine. The sake will slowly absorb and evaporate, and things will dry up again. Just be sure you aren’t overly enthusiastic with the tossing and stirring and start breaking up the potatoes.]
• Season with the soy sauce. Mix well, so that the potatoes are evenly coated with the thick brown sauce that has formed. Turn the heat down to low. Taste and add more soy sauce if necessary.
• Add the butter, stir and cook for another 5 minutes or so; until a crust has formed on the potatoes and each chunk is nicely brown and crispy on the outside.
• Serve immediately.
The play of flavors and textures is just wonderful. The aroma and taste of the sake is highlighted and lifted, yet mellowed and rounded out by the soy sauce. The neutral taste canvas of the potato provides a wonderful playground for this union of flavors.
And the icing on the potato must be the juxtaposition of the aromatic, crispy crust on the outside, and the tender, soft and fluffy flesh on the inside. Gorgeous!
There are only a few points that I have made a mental note of, for the next time I make these:
• It’s really important not to over-cook the potatoes at the boiling stage. Mine were a little overdone – we were busy poring over an article in the Sunday papers, and I momentarily forgot about the pot on the stove; the potatoes came out just a tad on the wrong side of soft. This meant that the surfaces started fluffing up and breaking down a little bit during the sautéing process, and impeded the crisping up of the crust.
• I would cut the potatoes into smaller pieces, to get more crispy crust to every bite.
• I’m also thinking that it might perhaps be more effective to use a non-stick wok, instead of a skillet. The former will probably give a better and more even distribution of heat, and help produce an even more delectable crust on the potatoes.
For brunch, I served these with some smoked salmon that were drizzled over with a light wasabi dressing, but I would have most happily eaten the potatoes on their own. They were seriously good.
It was a very spirited, warm, tingly and satisfying start to a relaxed and leisurely Sunday.
Copyright © 2004 Renee Kho. All Rights Reserved.
Please contact me for permission to copy, publish, distribute or display any of the images or text contained in this article.
11:39 PM in Home Cook: Rice, Noodles etc | Permalink | Comments (25) | TrackBack
Wednesday, August 25, 2025
Chinese Italian or Italian Chinese?
Whichever way it is, this dish is a very quick, easy, and most importantly, tasty dinner option. Two pots, seven ingredients (excluding seasonings), 30-35 minutes and you are ready to eat. And not only is it a minimum-fuss recipe to prepare, it is very healthy too – I love pasta (yes, pasta is a carb and yes, pasta is good for you; just look at Sophia Loren), and it works beautifully in this combination: the tofu offers a good source of quality protein and the walnuts bring with them their high concentration of omega-3 acids, while the classic Nonya rempah (ground spice mix) chilli garam (a combination of chilli, candlenuts and shallots) adds a fiery zing, and the fresh coriander, with its aromatic perfume, rounds off the flavor matrix with a refreshing nuance. This dish may be vegetarian, but I think it is one that even die-hard meat lovers won’t turn their noses up at.
Usually, when we think quick, easy and simple dishes, we think they are somehow not presentable enough to serve to guests; but this dish is eminently party-worthy. It is very pretty – the red chillis coat the pasta with the gorgeous colors of sunset, spiked with the warm golden brown of the walnuts and the lively green of the coriander. I have served this to friends and it’s been nothing but good responses from everyone. And the great thing is, it’s so easy and quick to prepare; you don’t have to be fiddling in the kitchen after your guests have arrived.
This dish is a (perhaps fairly eclectic) blend of Asian and Italian influences. Yes, it belongs to that now very maligned category of foods called “fusion”; but it works, and works very well.
Of course, you can choose to make it more Asian by using Chinese noodles like dried la mian, spinach noodles or egg noodles. Or, you can choose to play up the Italian-ness in the dish and use Italian flat leaf parsley in place of the coriander, and maybe use toasted pine nuts instead of walnuts. Really, this dish is highly versatile and very amenable to playful adaptation.
For those who truly can’t bear the thought of eating a meal without animal protein, diced chicken meat can be substituted for the tofu. And you can even use cashew nuts with the chicken instead of walnuts. Alternatively, try prawns with cashews.
I however really like this vegetarian version; I’ve made this pasta several times already, and it’s quickly become one of my favorite ways to prepare pasta.
Sambal Tofu Walnut Pasta
Serves approximately 4 persons
200-250g dried pasta (spaghetti, fettuccini or linguini) OR dried Chinese noodles (la mian, egg noodles)
1 teaspoon salt
2 large squares firm tofu (tau kwa), crumbled
100g walnuts, toasted and roughly chopped
4 stalks fresh coriander leaves (cilantro; Chinese parsley), chopped
1 lemon, cut into wedges
light soy sauce, to taste
sugar, to taste
For the Sambal:
12 shallots
12 dried red chillies
4 candlenuts (buah keras)
3 tablespoons olive oil
2-3 tablespoons light soy sauce, OR 1 teaspoon salt
1 teaspoon sugar
• Peel the shallots. Scald the dried chillies with boiling water and pat dry. Remove seeds. [I tend to remove all the seeds, and find that the dish has just the right amount of heat – enough to get me sniffling and stretching for a Kleenex. However, if more spiciness is desired, just leave some of the chillies with seeds in, or leave all the chillies with seeds in.]
• Using a mortar and pestle, pound the shallots, dried chillies and candlenuts to a paste-like consistency. [You won’t be able to get it to a completely smooth paste because of the dried chillies, but that’s good – the skins of the chillies offer interesting specks of texture, color and flavor in the final dish.] Set aside.
• Bring water to a boil in a large pot; add 1 teaspoon of salt and the pasta. Cook until al dente.
• In the meantime, heat a large frying pan. Add the oil and sauté the ground sambal ingredients until aromatic (about 5-8 minutes or when you feel your nostrils tingle a little and sense a sneeze coming on). Season with 3 tablespoons of light soy sauce (or 1 teaspoon of salt; though I tend to prefer the light soy sauce as it adds a depth and richness of color to the sambal and gives a more complex flavor too, but that’s just my personal preference) and 1 teaspoon of sugar.
• Toss in the crumbled tofu and fry for about two minutes. Add the chopped walnuts; mix well. Adjust the seasonings if necessary. [At this point I usually add another 2-3 tablespoons or so of light soy sauce and maybe ¼ to ½ teaspoon more of sugar if necessary. It sounds like a lot soy sauce but it really isn’t; and I’m one who can’t stand over-salted food. Of course, the amount needed also depends greatly on the brand of light soy sauce you use; some brands are much saltier.]
• When the pasta is cooked, set aside 3-4 tablespoons of the cooking water, drain the pasta and add to the sambal pan, together with the reserved pasta cooking water. [Do not rinse the cooked pasta; but if using Chinese dried noodles, you can give the cooked noodles a quick rinse under running water, then pour some boiling water over the noodles to warm them up again, before tossing them in with the sambal.]
• Add the chopped coriander leaves, and toss well.
• Serve hot, with lemon wedges.
I think the lemon is an important component; it somehow seems to bring all the flavors together into a cohesive whole, plus of course, it gives the dish a delightfully appetizing tangy overtone.
For me, one of the nicest things going for this pasta dish is the complex layering of both texture and flavor: the soft, creaminess of the tofu is contrasted with and complemented by the aromatic crunch of the walnuts and the tender toothsome-y bite of the pasta (in this instance I had actually used semi-wholewheat pasta); the tingling spiciness of the chilli rempah sets off the blank canvas of the tofu and pasta beautifully, while being highlighted by the perfumy herbiness of the coriander and the cheery zestiness of the lemon. The whole dish just comes together rather well: wonderfully rich in flavors and textures, whilst staying fairly light on the palate.
Okay, one final bossy suggestion from me: if you would like to tone down the chilli heat level of the dish, simply make some adjustments to the sambal: use less dried chilli (oh, maybe 9 or 10), more shallots (around 14-15) and more candlenuts (around 6 should be fine). The key really is just to maintain the volume of the rempah; the sauce is a very “dry” one, so the volume is necessary.
Alright, I lie. Here’s one more bossy suggestion; this really is the last one. I promise. Here’s a nod to the carb-avoiders: you can still create a great dish by junking the pasta altogether, and just sautéing the tofu and walnuts in the chilli sambal. This can then be served wrapped in crunchy lettuce leaves. Scrummy is the word.
Copyright © 2004 Renee Kho. All Rights Reserved.
Please contact me for permission to copy, publish, distribute or display any of the images or text contained in this article.
01:22 PM in Home Cook: Rice, Noodles etc, Home Cook: Soy | Permalink | Comments (15) | TrackBack
Thursday, May 27, 2025
Oodles of Noodles

More “fridge-clearing” food.
As I was clearing the fridge of food items that needed to be used up (and that prompted me to make my banana breads), I also discovered a couple of packets of dried noodles that have been sitting in the fridge for who-knows-how-long. For months, they have sat there, long-forgotten, neglected and ignored. They looked rather forlorn in their already opened packages. Some of their traveling companions have long ago already been happily utilized and turned into delicious dishes, and they have remained ever hopeful that their turn would come soon. And now, finally, the time has come.
There were some Japanese sobacha (green tea buckwheat noodles) and some Taiwanese “milk noodles”. So, we decided to have a very simple and light dinner for a change. Just noodles with some easy-to-do toppings.
There are no recipes here, and these are not “established” styles of konlo (dry-toss) noodles. That evening, it was more a case of an almost haphazard throwing together of whatever ingredients we had on hand… no worries or thoughts about presentation, ingredient color coordination and so on. The flavor combination in the case of the soba was unorthodox to say the least, but it actually worked pretty well.

First, the milk noodles. These were simply cooked in boiling water until al dente, drained and immediately tossed with a mixture of sautéed shallots, lightly sautéed minced garlic, a little shallot oil, a dash of light soy sauce and a dash of sesame oil.
The noodles were then topped with a very simple dish of thinly sliced beef tenderloin sautéed with garlic, shallots, ginger, oyster sauce and light soy sauce. It was a variation of the “beef with szechuan vegetable” recipe that I had posted previously. The differences being that the red chillies and szechuan vegetable were omitted, and instead of using large onions, I opted for shallots. The dark soy sauce was also left out this time around, as I wanted a lighter coloring. The oyster sauce thus provided the color for the dish.
And to complete the noodle dish, a serving of flowering cai xin vegetables – boiled till tender and tossed with some garlic-shallot oil.
Ta-da! Ready to be served.
This was what the rest of the family had, preferring as they did to have some meat as part of their dinner meal. I, on the other hand, wanted something very, very light, and opted for a vegetarian noodle dish…
I had the sobacha. Now, green tea soba would usually be served as a cold noodle dish – most commonly eaten plain and without embellishment, with just a simple shoyu based dipping sauce. My version, however, was a real mix of styles. It was unorthodox and unconventional, but not intentionally so. It just happened that way. I sort of simply brought together whatever it was that needed to be eaten up and arrived at something that turned out to be very tasty.
Remember the “mistake” with the spicy bean paste and hoisin sauce mixture during the making of the grilled banana leaf fish the other night? Remember how I had to scoop out half of the overly sweet sauce mixture and reserve it for another use? Well, here was the “another use”.
I added a little more of the spicy bean paste to balance the flavors out a little, and put it into a dish, together with some sautéed shallots and a little bit of shallot oil, to await the noodles.
The soba was cooked in boiling water until al dente…

…drained, placed into the dish with the sauce mixture and tossed.
Yes, I served the soba warm instead of cold, but topped instead with chilled raw carrots and cucumbers that had been very finely shredded (this was quite important, as it added to the textural experience of the noodle dish).

The combination may sound a little weird, but it tasted very good. Warm green tea soba, tossed with an intensely flavored, punchy spicy bean paste sauce, and topped with cool, refreshing vegetables. The flavors worked, the textures worked, and even the contrast between warm noodles and chilled vegetables worked – very well at that. I really enjoyed the dish!
And oh, by the way, this spicy bean paste would make a great base for dan-dan mian or zha jiang mian. For a very simplified version, simply sauté some minced pork (or chicken, if preferred) with minced garlic and the spicy bean paste sauce, and serve it atop Chinese la mian, or other types of Chinese noodles like the “milk noodles” above. For more complex flavors, include some very, very finely diced Chinese mushrooms and pressed/firm tofu in the meat mixture.
I like this brand of spicy bean paste. It’s a recent discovery. Previous brands that we’ve tried have been found wanting either in terms of the flavor balance or because of the additives and preservatives used in the production of the sauce. This version, I feel, has a nice balance between the saltiness and the spiciness of the sauce, and is richly flavorful, without any apparent additives or preservatives (if the label is to be believed). I have not detected any aftertaste of MSG or other additives, so I’m well pleased. In fact, this sauce is rather addictive. I really like it with noodles, and am already planning my next noodle sortie, with it as the starring ingredient.
I am also reminded of how much I really like the Taiwanese “milk noodles”. I had forgotten all about it, but now that I’ve re-discovered it, I think I will go out and buy another pack. It tasted so good.
I love noodles. I’m a real noodle person, probably more so than I am a rice person! Oodles of noodles. Exactly my kind of a meal!
Copyright © 2004 Renee Kho. All Rights Reserved.
Please contact me for permission to copy, publish, distribute or display any of the images or text contained in this article.
03:11 PM in Home Cook: Rice, Noodles etc | Permalink | Comments (4) | TrackBack
Sunday, May 23, 2025
IMBB? – Around the World in a Bowl of Rice: Nasi Briyani

Last weekend, some friends came over for dinner, and I cooked up some Indian nasi briyani. This allowed me to achieve two purposes: one, a highly enjoyable evening in the wonderful company of close friends, with food that everyone thoroughly enjoyed, and two, the fulfillment of my entry requirements for this fourth installment of IMBB? “Around the World in a Bowl of Rice”.
[For those who are wondering, “Is My Blog Burning?” (IMBB) is a distributed cooking event, inspired and launched by Alberto back in February, with the inaugural edition featuring soups. The baton passed to Clotilde in March with her tartine edition, and yours truly picked up the cake in April. And now we are into May, and Pim has kindly offered to host today’s “rice-y” affair.]
Nasi briyani is Indian by birth, but has been warmly welcomed and adopted by South East Asians. This rice dish now forms an integral part of the Singaporean and Malaysian epicurean landscape, and is highly popular amongst not only the local Indians but also the Chinese and Malays as well. There is even a Malay version of nasi briyani (sometimes spelt as "biryani" or “beriyani”).
What is nasi briyani? In a nutshell, it is a fragrant and spicy delicacy of saffron-flavored basmati rice layered with an equal or greater proportion of spicy meat, with each layer sprinkled with nuts and fresh herbs, then sealed and steamed to finish. The “meat” can be chicken, lamb or mutton, and in modern times, prawns too. The key to a good nasi briyani is the basmati rice. High quality long-grained rice is of the utmost importance in the creation of delicious nasi briyani. Basmati rice is usually graded by its length and the quality of its cashew-like aroma.
I first learnt to cook this dish some 9-10 years ago. At the time, I was going through a “fixated with Indian food” phase and took some cooking classes from a lovely Indian lady. Her name was Lucky (yes, really, that was her name), and she was a wonderful, warm, highly personable grandmother, who was then already in her 60s. With children grown and grandchildren in school, she had decided to turn her great love for Indian food and its culinary culture, and her over 40 years of experience cooking for her family into a profitable hobby – teaching people how to cook authentic, tasty Indian dishes.
Hers was a blend of home-style cooking that had been honed and refined over four decades of cooking two meals a day for her husband and family, and a worldly-wise savvy about Indian restaurant cooking and the “tricks of the trade” so to speak. She loved food and eating. She would go and eat at Indian restaurants in India, Singapore and abroad, and just from tasting the food, she would pick up tips on how to further refine her own cooking style. So, lessons in her home kitchen were filled with insightful housewife tips as well as little nuggets of restaurant secrets for tasty Indian cooking. Her recipes were a wonderful combination of the honesty of home-cooked food (the best, and probably the most authentic, sort of food in any culinary tradition, in my opinion) and a certain restaurant-style refinement. Each cooking lesson culminated in a delicious lunch of 4-5 Indian dishes, enjoyed as we sat around her dining table, eating and swapping cooking and food stories.
Since learning this dish almost a decade ago, I’ve made it a few times, but not in the last 5-6 years. It was only after a recent discussion among friends as to where good authentic nasi briyani could be found in Singapore that I remembered this recipe, and decided to re-visit it and invite the friends over to enjoy it.
I’ve tweaked the original recipe slightly, adding one or two additional spices plus other ingredients, and in some cases adding greater quantities of some of the spices than originally called for.
Right, I shan’t yabber on for much more. I have been told I was too long-winded in my previous IMBB entries. ![]() So, without much further ado… here is my chicken nasi briyani (saffron-flavored rice with chicken).
So, without much further ado… here is my chicken nasi briyani (saffron-flavored rice with chicken).
Chicken Nasi Briyani
(serves 4)
The Rice
400g (approximately 3½ rice-cooker cups) basmati rice
1 litre water
1 tablespoon whole coriander seeds
1 teaspoon whole cumin seeds
2 pieces bay leaf
4 whole green cardamons – lightly broken
2 whole brown cardamons – broken and shell removed *
1” cinnamon
5 pieces cloves
½ teaspoon whole black peppercorn
½ teaspoon salt
few strands of saffron **
3 tablespoons of warm milk
* These may be substituted with green cardamons, if the brown ones are not available. In this instance, I actually used all green cardamons, as I was out of the brown ones.
** Instead of using saffron, some orange food coloring may be used. Simply dilute a couple of drops of the coloring in a little bit of warm water and sprinkle judiciously over rice.
• Wash the rice, and soak in the 1 litre of water for at least 30 minutes.

• Wrap all the spices (except the salt and the saffron) in a piece of muslin cloth and tie to form a spice bundle.
• Add the spice bag and the salt to the rice, and cook, using the soaking liquid, in a rice cooker or a large saucepan.

• In the meantime, soak the saffron strands in the warm milk and set aside.

The longer the saffron is soaked the deeper the color infusion and the more intense the fragrance.
Natural saffron will not give the intense orange coloring often seen in restaurant-versions of briyani. So, for more eye-appeal, it is also possible to use a little orange food coloring in addition to the natural saffron coloring.
The Crispy Shallots
• Peel and thinly slice 6-8 shallots.
• Fry in hot oil until crispy and a deep golden brown.
• Drain on kitchen paper towels.
• Set aside two-thirds of the shallots for the assembly of the nasi briyani, and the remaining one-third for garnish.
• Reserve about 2 tablespoons of the oil that was used to fry the onions.
The Chicken
1 kg chicken – bone-in, skinned ^
9 cloves garlic – skinned
2” piece fresh young ginger – skinned
Marinade:
1 teaspoon chilli powder
1 teaspoon garam masala
½ teaspoon turmeric powder
½ teaspoon salt
180ml natural unsweetened yogurt
Gravy:
1 big red onion (or 3-4 shallots) – finely chopped ![]()
1 teaspoon chill powder ^^
3 teaspoons coriander powder
1½ teaspoons cumin powder
½ teaspoon garam masala
salt to taste
1-2 green chillies – chopped ^^^ (optional)
3 medium tomatoes – peeled, seeded and diced ![]()
4 fl oz (½ cup) evaporated milk ^^^^
1 big bunch coriander leaves – chopped ![]()
½ bunch mint leaves - chopped ![]()
[all measurements are by the rounded spoonfuls]
^ I used 6 large whole chicken legs (with each cut into two - thigh and drumstick), and this came to about 850g.
^^ I used our own home-made chilli paste instead of the chilli powder, as I wanted a more complex flavor and more intense heat (our home-made chilli paste includes some bird chillies among other ingredients).
^^^ Seed and de-vein the chillies if a milder heat is desired.
^^^^ Evaporated milk seems to be the standard used by most Indian housewives, and most of the recipes I’ve seen also call for evaporated milk, although a few use fresh milk instead, with one or two recipes even using just water.
[On a side note, I’ve very recently discovered cooking curries with thick soy milk (Singapore local brand, Sobe, unsweetened version) and found that it actually gives a more “lemak” (rich) texture and mouth-feel than milk, with no soy milk taste at all. And it’s become one of my favorites now for cooking healthier versions of lemak curries. I think it would work just as well in this briyani. However, having said that, the soy milk sold in cartons in Europe and the US probably would not work, as they have a completely different consistency and, if I may be honest, do not really taste like soy milk! Sorry… but it’s true. So, in which case, evaporated or fresh milk would be the way to go.]

• In a food processor, grind together the ginger and garlic to form a paste. There should be roughly four tablespoons worth of ginger/garlic paste. Set aside.

• Clean the chicken and remove excess fat.
• Marinate the chicken with the marinade spices, salt, yogurt and half the ginger/garlic paste. Leave to macerate for at least an hour, but preferably for 4-6 hours.

• In a wok or large deep frying pan, heat the reserved shallot oil. Add the chopped onions and the remaining garlic/ginger paste, and sauté until the onions are soft and translucent.

• Add the marinated chicken.

• Once the chicken has changed color, the chilli powder (or paste), coriander powder and cumin powder goes in. Mix thoroughly.
• Throw in the green chillies.

• The tomatoes go in next. Stir to combine, and leave to simmer for a few minutes.

• Pour in the milk, and mix well.
• Cover the wok and allow to simmer, on low heat, until the chicken is almost cooked (about 20 minutes), stirring occasionally.
• Sprinkle half of both the coriander and mint leaves.
• Season with the garam masala and salt to taste. Mix well.
• Cover again, and leave to simmer on low heat until the chicken is cooked (approximately another 10 minutes), stirring occasionally.
• Remove from heat.
The chicken can be cooked ahead of time up to this point, and set aside. The rice can also be cooked in advance. And both can then be assembled half an hour before dinner is served.
The Assembly
Banana leaves (optional) *
Cooking spray
Deep fried crispy shallots (prepared earlier – see above section “The Crispy Shallots”)
Remaining coriander leaves (see above section “The Chicken”)
Remaining mint leaves (see above section “The Chicken”)
* This is usually not called for in recipes, and is purely optional. I’ve included it in my version of the recipe simply because I like the aromas that the banana leaves impart to the rice.
• Preheat the oven to 190-200C or 375-390F.

• Line a deep casserole dish with banana leaves. Allow enough excess “height” so that the leaves can be folded over to fully cover the assembled rice.

• Put half the chicken, without the gravy, in a single layer at the bottom of the casserole.
• Sprinkle half of the crispy fried shallots and half of the remaining amount of coriander and mint leaves.
• Spread half of the cooked rice over the chicken and herbs. Sprinkle half the amount of saffron-infused milk over the rice.
• Repeat with the remaining chicken, crispy shallots, coriander leaves, mint leaves, rice and saffron-milk.
• Fold the banana leaves down to fully cover the rice. Replace lid of the casserole dish.
• Place into the oven for 20-25 minutes, to allow to the rice and chicken to fully heat through and for the flavors to meld together.
The Gravy

In the meantime, prepare the gravy.
• Return the wok, with the residual chicken gravy, to the stove. Add between ½ to 2 cups of hot water, and simmer on low heat for about 8-10 minutes or until the gravy is reduced to the desired consistency.
[We love having quite a bit of gravy to go with the chicken and rice, and we also like the gravy slightly thick, so I add about 1 cup or so of water. The amount of water added can be varied depending on the amount of gravy desired and the consistency preferred.]
The Chicken Nasi Briyani

• Serve the rice with some raisins, the remaining reserved crispy shallots and toasted cashew nuts sprinkled on top.
If available, I highly recommend serving the nasi briyani on fresh banana leaves (as I did that evening). The entire eating and taste experience is considerably enhanced, and the aromas and flavors are just that little bit more complex and enticing, when the rice and chicken are eaten off banana leaves, instead of plates. Going further still, nasi briyani tastes absolutely divine when eaten not only from banana leaves but also with your fingers! (And not only is it a lot more enjoyable, there is a whole lot less washing up to do!)
That night, I also made up a very simple sweet, sour, spicy cucumber and chilli “salad” (something that I make very regularly) as a light and refreshing accompaniment to the rice and chicken.
Other nice side dishes would be raita (yogurt and cucumber salad), or spicy pickled vegetable salads.
The nasi briyani was a hit! Everyone ended up eating double the amount of rice they would normally eat. The only disappointment was that there wasn’t enough rice and chicken to go around! Everyone was still hankering for more!
My guests demanded to know why I’ve kept the recipe a secret for so long. I haven’t, and it wasn’t intentional. I had just forgotten the recipe existed. But now that it has been re-discovered, I’ll definitely be cooking it more regularly. Already my friends are planning the next “briyani night”…
Copyright © 2004 Renee Kho. All Rights Reserved.
Please contact me for permission to copy, publish, distribute or display any of the images or text contained in this article.
11:03 AM in Home Cook: Poultry & Meats, Home Cook: Rice, Noodles etc | Permalink | Comments (31) | TrackBack
Tuesday, May 04, 2025
One of My Favorite Noodles – Yee Fu Mein

This is one of my perennial favorites when it comes to noodles. Hong Kong Yee Fu Mein. This noodle can probably be easily counted as one of the least healthy of Chinese noodles, and yet also probably one of the yummiest.
Yee fu mein (or yee mein for short) is a uniquely Hong Kong-style noodle. In essence, it is a thin wheat noodle that is deep fried during the manufacturing process. And it is sold cooked and shaped into hard crunchy “disks” like this…

I recently discovered this Singapore-made brand and found it to be pretty good – very authentic. One of the closest to the genuine Hong Kong version that I’ve seen. There are many brands of yee fu noodles on the market, and many of them are somewhat localized in style, appearance and texture – what I have dubbed “Singapore-style Yee Fu Mein”.
It is the deep frying step during the noodle-making process that gives yee fu mein its uniquely tasty flavor and texture. But this is also what gives it easily seven to ten times the amount of fat of regular noodles, be they la mian, egg noodles, wheat noodles or rice noodles! And yet, the scrumptious factor of yee mein is such that I would say it is all worth the indulgence, never mind the waistline. ![]()
Generally, the noodles are good to go almost straight out of the packet. They just need to be added into a rich stock or gravy, left to simmer and soften for about five minutes, and they are ready to be served.
However, when I cook the noodles at home, I first blanch them in a pot of boiling water for about 2-3 minutes or so, then drain well, before adding them to the gravy to simmer for another 2-3 minutes.

At least in this way, some of the surface oil from the deep frying manufacturing process is removed. It assuages my guilty conscience a little when I see that film of oil left behind in the blanching liquid.
(The noodles are not, in “real life”, such a deep yellow color as seen in the above picture. The camera picked up the yellow tones of the cooker hob’s downlight and turned everything yellow in the photo.)
Right, so what do you cook these noodles with? A key ingredient that almost never varies is superior stock or broth. This forms the basis of any good yee fu mein dish. Other than that, most restaurants sauté the noodles very simply, with just one or two other ingredients.
The most common accompaniment is “yellow or pale” garlic chives, known as “gau wong” in Cantonese and “jiu huang” in Mandarin. These are regular Chinese garlic chives that have been grown under cover, away from sunlight, and thus do not become green, but are instead a very pale greenish-yellow color. Gau wong is more highly prized than the regular green chives (gau choy or jiu cai or koo chye).
Another popular version is dried scallops (gan bei or conpoy or kampoi) yee fu mein. Also a classic preparation is yee fu noodles sautéed with what are known as golden mushrooms (jin zhen gu in Mandarin) to the Chinese and enoki mushrooms to the Japanese. Other than these, the noodles are also occasionally sautéed with crab meat or chicken.
The accompanying ingredients used in cooking yee mein can, fairly flexibly, within some fairly wide boundaries, be improvised and adapted to suit personal tastes. However, stronger tasting meats like beef or lamb, and other intensely flavored ingredients, are almost never used. The yee mein is already richly flavorful in of itself, unlike regular noodles which are bland and pick up all their flavors from surrounding ingredients. As such the supporting ingredients in a yee mein dish are generally kept as simple as possible.
Having said that, this particular version that I cooked recently was a rather mixed bag. I had originally intended to make a vegetarian version of the noodles, using just a mix of different mushrooms, but then decided to add some chicken. And when I realized that I had some char siew (BBQ pork) leftover from lunch, I decided to use that too, to top the noodles with. The final dish was perhaps thus not quite authentically yee mein in that sense. It was a home-style version, but still nevertheless a very delicious variation that was chock-full of ingredients.
The gravy was a combination of carrots, Chinese dried mushrooms and chicken…
The Gravy
• Julienne the carrots and thinly slice the mushrooms.
• Heat a small amount of oil in a wok or frying pan, and add the carrots. Sauté until the carrots are just about to soften. Add some minced garlic and finely chopped shallots. Briefly sauté until the shallots are soft, before adding the mushrooms. Season with some light soy sauce and pepper. Remove from the pan, and set aside.
• Re-using the same pan, again sauté some minced garlic and finely chopped shallots. Once these have softened, add the marinated chicken*. Stir-fry until the meat is cooked through.
* Cut chicken into thin strips and season with a little sesame oil, light soy sauce, oyster sauce, pepper and cornflour.
• Return the carrot/mushroom mixture to the pan, and mix with the chicken. Add about 1 ½ cups (for a 4 person serving of noodles) of superior chicken stock or broth.

(Again, yellow tones of the picture are due to camera effects.)
• Bring gravy to a boil and add the blanched and drained noodles. Allow to simmer for 2-3 minutes. The noodles will absorb most of the broth to give a final dish that has a very slight gravy to it. Taste and adjust seasonings accordingly – adding a little more light soy sauce, oyster sauce and pepper if necessary.
• Finally, if desired, sprinkle some chopped coriander and spring onions (scallions) over noodles. Turn off the heat, and toss noodles to allow the coriander and spring onions to wilt in the residual heat.

Char siew is most definitely an unconventional accompaniment to yee fu noodles. It’s not usually done – except of course in Renee’s kitchen! ![]()
No, I wasn’t trying to be creative or to push the boundaries of Chinese culinary culture. I had happened to have some char siew slices left over from lunch, and it seemed such a shame to let them go to waste. So, I simply decided to “refresh” them a little, and add them to the noodles.
The char siew slices were very quickly heated through in a frying pan, with some chopped scallions and a tiny bit (maybe about ½ tablespoon) of oyster sauce added to “enhance” the flavors a little. Just a quick sauté of less than a minute, and the BBQ pork slices were ready to be arranged on top of the plated noodles.
Unconventional it may have been, but still a rather tasty concoction, if I may say so.
Yee fu mein… a rich and intensely flavorful noodle experience.
Copyright © 2004 Renee Kho. All Rights Reserved.
Please contact me for permission to copy, publish, distribute or display any of the images or text contained in this article.
02:03 PM in Home Cook: Rice, Noodles etc | Permalink | Comments (10) | TrackBack
Wednesday, March 24, 2025
From Siam to the Straits Settlements
We’ve been eating out a lot lately, and therefore nothing terribly exciting or interesting has been happening on the cooking front these last few days. So I thought I would post about this dish that we cooked a while back – in fact, quite a few months back. I never wrote about it before because the photos are of rather poor quality. That evening, my camera battery had gone flat, so I ended up using the digital video camera to shoot the pictures. And for some reason, video cams seem to produce still shots that are rather pixelated and flat-looking, and its flash creates a gazillion “hot spots” on the pics. My apologies for the poor pics.
Mee Siam. Another distinctive Malaysian and Singaporean dish, with roots in the Thai-influenced Nonya culture of Northern Malaysia, and more specifically Penang. And thus the name of the dish… “noodles of the Kingdom of Siam”. It is essentially rice vermicelli (bee hoon) in a spicy-sour gravy, and topped with very simple ingredients.
Penang Nonya (sometimes spelt “Nyonya”) food is distinct from Straits or Melaka Nonya food. The former, being heavily influenced as it is by Thai culinary traditions, tends to be comparatively lighter than their Southern cousins, with a refreshing, tangy, zesty twist from the use of such ingredients as tamarind (assam jawa) and kaffir lime. Straits Nonya food (from the cradle of the original Straits Settlements of Melaka and Singapore) takes its influence more heavily from Indonesian and Malay cuisines, and thus coconut cream and coconut milk feature prominently in almost all the dishes. The spice mix used in the different Nonya dishes also reflects the respective Thai or Malay traditions.
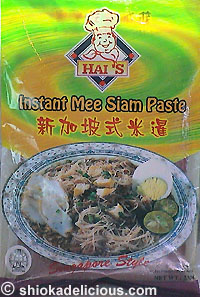
Our version of mee siam was done the quick-and-easy way, using store-bought, ready-prepared mee siam paste. We wanted to do a test-run of Hai’s brand’s version, and see how it compared with the paste from Prima Taste. We had tried the latter a few years back, and it was tasty and authentic. I can’t really remember the reason why we never bought it again – possibly because it had msg, and the family, where possible, especially when cooking at home, prefer not to have msg in our food.
It is actually not too difficult to make this dish from scratch – the rempah (spice mix) is not too time-consuming to prepare. There are also many abridged versions of the recipe (a quick Google search verified that), which makes the dish simpler still to prepare. And perhaps with only a slight loss in the richness of flavors.
Here’s an overview of the unabridged version. The foundation of the rempah is shallots, dried chillies (soaked to soften) and shrimp paste (belacan) pounded together*, then fried in oil with dried shrimp (hae bee) until the spice mix is fragrant and there is a separation of the oil. Part of this rempah is then set aside for later use with the gravy, while the rest of it has prawn stock added to it. Bean sprouts and rice vermicelli are added to the boiling stock and “stir-fried” until cooked and the stock has been absorbed. I say “stir-fry”, but the rice vermicelli shouldn’t really actually be stir-fried as it will break into many small pieces. “Toss-fried” may be a more accurate description. (See my previous post on fried bee hoon for greater detail.)
* A food processor can be used, but a mortar and pestle would be best for authentic taste and texture.
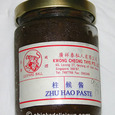
The gravy is basically preserved soy bean paste (tau cheong), shallots, tamarind (assam) juice, sugar and stock, that is left to simmer for maybe ¾ to 1 hour. The reserved rempah from earlier is then added. Once the gravy returns to a boil, it can be ladled over the individually plated bee hoon (rice vermicelli).
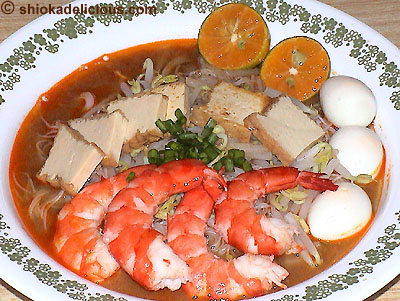
Finally, the dish is topped with wedges or slices of hard-boiled eggs, cubes of fried tau kwa (firm tofu), cooked prawns and chopped flowering chives, with local lime (limau kesturi) halves on the side. There will of course also usually be generous amounts of sambal (spicy chilli paste) available as a side condiment.
Now, for Renee’s severely abridged version, for the lazy or convenience cook. ![]()
![]()
Go to supermarket and pick up a packet of ready-prepared mee siam paste…
Remember to also pick up some of the other ingredients that are needed…
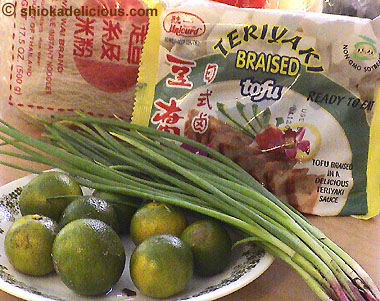
Rice vermicelli (bee hoon), tau kwa (firm tofu), limes, chives or spring onions in lieu, prawns (not pictured) and eggs (also not pictured).
Once home, and if not feeling too lazy, “stir-fry”/cook the rice vermicelli with some of the instant mee siam paste. Dissolve some of the paste in boiling water or stock, add the rice vermicelli (and bean sprouts), and toss until cooked and all liquid has been absorbed.
If feeling lazy, just cook the rice vermicelli in boiling water and drain well.
In another pot, dissolve the remaining instant spice paste in more water or stock, mindful of not adding too much liquid so that the gravy becomes too diluted. Adjust flavors to suit personal tastes: more sugar or more tamarind juice, more salt and so on. Bring to a boil.
Ladle gravy over plated rice vermicelli.
And you would of course have organized yourself perfectly, such that by this stage all the other ingredients have also been prepared and are sitting and waiting. (Hey, I said it was abridged, but I didn’t say it was simple ![]() ).
).
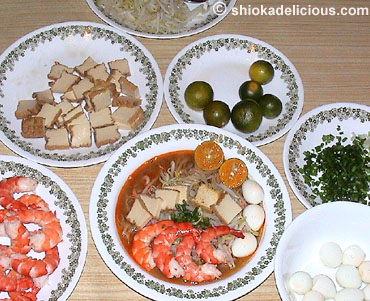
Clockwise from bottom left hand corner: Prawns – large prawns make for nice presentation, but any type of prawn will do. Some people add them to the gravy to be cooked. There is however a common tendency for the prawns to become overcooked and chewy and bland as a result. I prefer to steam them with shell on, as I find this gives juicier, moister prawns with a more succulent texture. Boiling them would work too. Once cooked, shell, split into half or keep whole, and serve on top of the bee hoon.
Tau kwa or firm tofu. We normally use the regular fresh version from the market, and pan-fry the whole square of bean curd until a light golden color, before cutting it into cubes. This time round, we decided to try out a teriyaki-flavored tau kwa from the supermarket. No, the flavor mix didn’t taste weird. But we weren’t comfortable with the after-taste of the tau kwa - perhaps it was preservatives or something.
Tau gay or bean sprouts. Usually, this will be cooked with the vermicelli in some stock/rempah mixture. However, for those times when the vermicelli is just boiled in water, simply blanch the bean sprouts in boiling water, and add them to the vermicelli at the end, during the plating process. This also actually gives a much crunchier sprout.
Limes. Simply halve and serve on the side of the plate.
Flowering chives. Chop and sprinkle over. That night, we didn’t have chives, so we used spring onions instead. I’ve also seen chopped coriander being used.
Eggs. Hard-boil, peel, cut into wedges or slices, and arrange on top of the bee hoon. My family has a great love for quail eggs, so we tend to use that instead of chicken eggs.
And mee siam is served.
The verdict on Hai’s mee siam paste? It would suit those who like their mee siam on the sweeter side. For us, we ended up adding quite a bit more assam (tamarind) juice to the gravy. Adding more sambal to the gravy would also have probably worked nicely. The paste was not intensely concentrated, so the volume of liquid used to make the gravy had to be carefully balanced for optimum flavor intensity. We also shouldn’t have been lazy, and should have fried the rice vermicelli with some of the paste, instead of simply boiling it in water. That would have enhanced the overall taste balance of the dish.
Mee siam is a palate teaser and pleaser. It is a seamless coming together of spiciness, sourness, sweetness and saltiness. It displays its elegant Thai culinary pedigree, but spiced up with Peranakan oomph and panache.
Copyright © 2004 Renee Kho. All Rights Reserved.
Please contact me for permission to copy, publish, distribute or display any of the images or text contained in this article.
11:30 PM in Home Cook: Rice, Noodles etc | Permalink | Comments (9) | TrackBack
Friday, March 05, 2025
TGIF
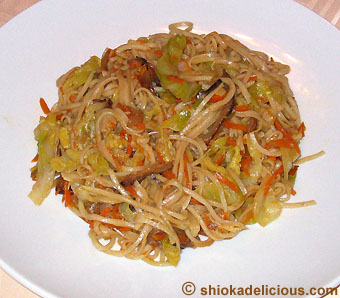
I was going to do a proper post tonight, but it’s been a very, very looooonnnggg day. And I’m feeling rather stressed, very tired and somewhat cranky. So, it will just be a picture of my lunch today… home-cooked vegetarian fried noodles – dried la mian with lots of cabbage, carrots and Chinese mushrooms, and lightly flavored with a little oyster sauce and light soy sauce.
I was supposed to do some work tonight, but it is already after 3am, and I think I’ll be needing toothpicks or something to prop up my eyelids. So, I’m off to bed, or else I’m sure I’m going to give in to my craving for Ben & Jerry’s. There must be some connection between being awake at this hour and craving ice cream. Hmmm…
Okay, I’m rambling… I’m off to bed… G’nite!
Copyright © 2004 Renee Kho. All Rights Reserved.
Please contact me for permission to copy, publish, distribute or display any of the images or text contained in this article.
03:20 AM in Home Cook: Rice, Noodles etc | Permalink | Comments (4) | TrackBack
Tuesday, March 02, 2025
Pasta Goes East
This dish was my first introduction to pasta as a young child. I suspect when my mum first cooked it back then, she probably didn’t know of the “real” ways pasta was eaten by the Italians. Perhaps it did not even occur to her, in a conscious way, that macaroni was Italian. I for one didn’t even realize macaroni was Italian until I was quite old! Imagine that! Macaroni was just very naturally part of my and my family’s epicurean landscape. I simply thought it was Chinese! And I think it would be safe to say that a few decades ago, pastas such as macaroni were simply seen as an extension of, or even part of, the deep-rooted Chinese tradition of eating noodles. And this is perhaps one of the reasons why the Chinese take so easily to pasta. It’s familiar. Just noodles in different shapes and with a slightly different texture and taste. And often, in Chinese families, pasta is prepared in very Chinese ways – in much the same ways as Chinese noodles would be prepared.
Of all the different pastas, it would seem that for some reason or other, the macaroni is the most conducive for “interpretation” and “adaptation”. Or “aberration” as some may see it. The brightly colored, thick and gooey American invention “macaroni and cheese” immediately comes to mind. But other culinary cultures also have various manifestations of macaroni too. And I guess this dish is the Chinese “adaptation”.
I used to think this dish was perhaps unique to my family, what with our sometimes rather strange eating habits, but over the years, I’ve discovered that many Chinese families used to cook macaroni like this, or very similar to this. Friends have shared fond childhood memories of eating fried macaroni regularly, the same way fried noodles was eaten regularly.
My mum cooked this macaroni dish in much the same way she would stir-fry the Chinese noodle “lao shu fen” (Mandarin) or “lou shue fun” (Cantonese). Literally translated, the name means “mouse noodle”, perhaps so called because the short 1½” to 2” noodle looks like a mouse tail, with a round body tapering to a point at both ends. [In Singapore, this noodle is perhaps more commonly referred to as “mee tai bak”, and served “dried toss” (kon lo) or in soup, rather than stir-fried, which is the more common version in Malaysia.]
As a kid, it was always a real treat for me to come home from school to find that lunch was either fried lao shu fen or fried macaroni. To this day, these two dishes belong firmly on my list of “comfort food”. I don’t eat them regularly anymore. But once in a while, I will suddenly think of them, and feel a “need” to eat them. It’s a feel-good thing.
So, here’s the recipe for my family’s version of fried macaroni. This is yet another very flexible dish. It can be altered or adapted to suit personal taste preferences or simply to suit whatever happens to be in the fridge and pantry at the time. Depending on our mood and what we have around when the craving strikes, we alternately use either minced beef or beef tenderloin. (The latter of course gives added luscious tenderness, moistness and flavor). We also alternately cook it “light” or cook it “dark” – whatever takes our fancy when we are standing at the stove.
It has to be said though that I think “black” or more accurately “dark brown” colored noodle dishes are very much part of the “comfort food” psyche of the Chinese in South East Asia. Such dishes seem to strike a very deep chord in us. The various “dark” noodle dishes that we wax lyrical about comes to mind… Malaysian fried Hokkien mee, Singaporean char kuay teow, Singaporean lor mee, and many more. It’s just something about noodles cooked with dark soy sauce, or sweet dark soy sauce (kicap manis).
Stir-Fried Beef Macaroni
Main Ingredients
Macaroni
Beef tenderloin – finely diced; OR minced beef
Fresh button or field mushrooms – finely diced
Carrot – finely diced
Onion – finely diced
Shallots – finely chopped
Garlic – minced
Spring onion/green onion – finely chopped
• Cook the macaroni in boiling water until al dente. Drain and set aside.
• Marinade the beef with some light soy sauce, oyster sauce, sesame oil, sugar, pepper and a little cornflour (optional – but helps enhance the texture of the beef).
• In a little hot oil, sauté the finely diced onion until soft and translucent. Add the beef and quickly sauté for just long enough for the meat to be partially cooked through. Avoid completely cooking the beef at this stage as it will finish cooking together with the macaroni later. Set aside.
• Sweat some minced shallots in the same hot wok or pan, and sauté the finely diced mushrooms very, very quickly. These cook real quick, and we don’t want them to get mushy. Season with a little light soy sauce, sugar and pepper. Set aside.
• Sauté the diced carrots with a little minced garlic until fairly tender and set aside. (I actually find there is no need to add seasonings to the carrots at this stage, as there will be plenty of flavor from the beef, mushrooms and the final seasonings added to the macaroni).
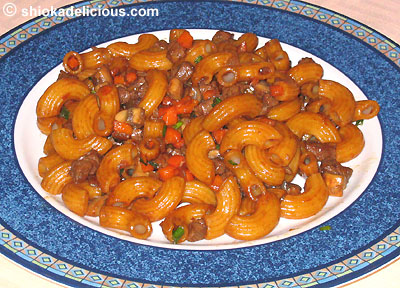
• For the final assembly: sauté a little finely chopped shallots in a tiny bit of hot oil. Add the cooked macaroni and season with some oyster sauce, light sauce, sugar and pepper. (For the dark version, as pictured, also add a dash of dark soy sauce). Mix well. Add the half-cooked beef, together with the pre-cooked carrots and mushrooms. Saute to mix well and just enough to allow all the flavors to meld. Avoid overcooking, as the beef will toughen and become chewy (especially for the tenderloin). Because they are so finely diced, they will cook very quickly indeed.
• Just before removing from the heat, sprinkle chopped spring onions, and toss to wilt slightly. Remove from heat and serve.
Notes:
• I tend to vary the use of minced garlic and chopped shallots depending on how I feel. Sometimes I fry the mushrooms with shallots only, other times with both shallots and garlic. Sometimes I fry the carrots with a little minced garlic, and other times I don’t use either garlic or shallots when pre-frying the carrots. Sometimes, I use just shallots with the macaroni, and other times both garlic and shallots. All permutations work fine.
• A dash of dark soy sauce can be added to the macaroni for just a touch of color, or for really dark color and for a sweeter taste, use a little of both dark soy sauce and sweet dark soy sauce (kicap manis).
• It may seem like this dish will turn out rather oily and greasy, but that is not the case. Miniscule amounts of oil are used to sauté the beef and vegetables. And the final dish usually has barely any feel of oiliness or greasiness.
• Finely diced chicken can be used instead of beef.
• Other vegetables can also be used – such as finely diced celery and so on.
Ah, the memories of childhood… macaroni and beef, it’s a good thing.
Copyright © 2004 Renee Kho. All Rights Reserved.
Please contact me for permission to copy, publish, distribute or display any of the images or text contained in this article.
05:00 PM in Home Cook: Rice, Noodles etc | Permalink | Comments (15) | TrackBack
Wednesday, February 25, 2025
Ra-Ra-Ramen!

We made some Japanese-inspired ramen for lunch last Sunday.
For those who know me, this must sound pretty amazing – me, eating soupy food for the second time within three days! First it was the fishball beehoon soup, and now ramen in miso soup. I was a little surprised with myself too. But there you go. Life is full of surprises. ![]()
I’m not a soupy-food person, generally. I’m okay with soups, just not soupy foods – you know, like soup noodles, soup bee hoon and others of that ilk. When eating out, almost invariably, I would order my noodles “dry tossed”. I hardly even look at the “noodles in soup” section on menus. At home, my noodles are usually “dry” too – be they fried, tossed, whatever. Even when I resort to instant noodles, it’s Mi Goreng only for me. For the same reason, I don’t really like Teochew porridge, which quite literally is pretty much watery rice. But I like Cantonese porridge which is not soupy. Oh wait. There’s one exception. I like mee sua in soup. Yeah, I know, my many quirky food idiosyncrasies. It’s not like I don’t eat soupy food, mind you. I do. Just not very regularly. Okay. Not very often at all. But I do.
Anyway, so it was on Sunday that we had some ramen in miso soup.
We didn’t make a “proper” miso soup – i.e. using dashi stock with miso. We had just made a huge pot of fresh chicken stock that morning. And there’s nothing quite like freshly boiled pure chicken broth, and so we thought it would be really nice to just add some miso to that, and make some tasty soup. The white miso was dissolved in a little of the chicken broth before being added to the rest of the barely simmering stock. We had planned to add some kombu (dried seaweed) into the chicken broth to simmer for a while before adding the miso. It didn’t happen. More on that later.
I am perpetually perplexed and dumb-founded by the different miso that line the supermarket cooler shelf. There must be a good 10-15 varieties at least, just for white miso alone. And that’s only at Cold Storage, and not even at the Japanese supermarkets. The names are all different, but they look pretty similar and their ingredients are the same or very similar. The Japanese names are different, but the English translation is always “soy bean paste”. That’s not much help is it? So, which one to use for which purpose? I usually end up standing for a good few minutes in front of the chiller staring at the different packs of miso. Sometimes, someone takes pity on the “damsel in distress” and makes a suggestion. Other times, another equally clueless and confused person joins me to stare at the miso. Eventually, a pack of miso will usually take pity on us, call out our name, and we hastily take it home with us.
Ramen in miso soup has to be the quickest and simplest dish to make, and yet it is tasty and fulfilling in a very comforting sort of way.
The dried ramen was cooked in a separate pot and then placed in the serving bowls, before the miso soup was added. The noodles were then topped with various ingredients. We did a schizophrenic mix of Japanese, Chinese and Western! Thin slices of Japanese fish cakes (these ones from Cold Storage were less refined and smooth compared to the ones we picked up previously from Kimesawa), slices of Chinese BBQ pork (char siew), some kombu and because we like veggies a lot, some raw shredded carrots and cucumber. And yes, I’m very big on colors… I want different colors in my food.
Oh yes, back to the kombu. Now, this was supposed to have gone into the chicken stock to be simmered for a short while. But we clear forgot about it. In fact, we didn’t remember until the noodles were ready, and everything was plated, then suddenly someone exclaimed “where’s the kombu?” It was still happily and blissfully soaking away in its own private water bath. And so, belated, we quickly heated up the kombu and simply plonked it onto the already plated noodles.
Please excuse the rather uninspired plating in the photo. By then, I was too hungry to worry about the aesthetics and the positioning of the ingredients. And my poor ramen, by the time we got our kombu act together, and I got my camera act together, it had busily and thirstily slurped up much of the miso soup and was already becoming fat and flabby (as you can tell from the photo)!
But, still, it was good. Light yet robust. Delicate yet hearty. Refreshing yet warming. Healthy yet fulfilling. Simple yet flavorfully and texturally complex. Quick and easy, yet nicely appealing. Need I say more? It was a tasty Sunday brunch.
Copyright © 2004 Renee Kho. All Rights Reserved.
Please contact me for permission to copy, distribute or display any of the images or text contained in this article.
05:00 PM in Home Cook: Rice, Noodles etc | Permalink | Comments (9) | TrackBack
Tuesday, February 24, 2025
Great Balls of F… Fish!

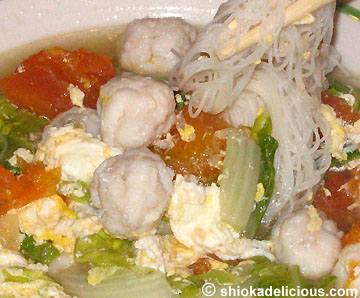
Made this for lunch last Friday. Home-made fish balls with some bee hoon (rice vermicelli) in a vegetable soup.
I had wanted something light, healthy, colorful, and quick and easy to prepare, and I didn’t want instant noodles. It so happened that my mum had just bought some “ma kau” (sorry, I don’t know the English equivalent for this… Chinese mackerel maybe?? if such a thing exists!) fish meat from Chinatown that same morning. Aha! Fresh home-made fish balls from very fresh fish meat. Sounded perfect.
This stall at the Smith Street wet market sells copious amounts of this fresh fish flesh (try saying that really quickly ten times in a row ![]() ) everyday. Two elderly Cantonese ladies sit there the whole morning just scraping meat off the fish and beating it into a smooth pulp. The beating is done by hand (I think) in a large wooden bowl, with maybe just a little salt water added to the fish meat. By the time my mum got to the stall they were out of the ready-prepared fish pulp, and were still in the midst of preparing the next batch. Not wanting to wait, my mum simply bought the scraped fish mash, and had planned to beat it into the smooth pulp herself when she got home. I was lazy and couldn’t be bothered, so I gave the fish meat only a quick mash before shaping them into balls. I thought it produced a rather interesting texture - different from the usual fish balls. There was a less refined, almost rustic, look, feel and texture to my fish balls.
) everyday. Two elderly Cantonese ladies sit there the whole morning just scraping meat off the fish and beating it into a smooth pulp. The beating is done by hand (I think) in a large wooden bowl, with maybe just a little salt water added to the fish meat. By the time my mum got to the stall they were out of the ready-prepared fish pulp, and were still in the midst of preparing the next batch. Not wanting to wait, my mum simply bought the scraped fish mash, and had planned to beat it into the smooth pulp herself when she got home. I was lazy and couldn’t be bothered, so I gave the fish meat only a quick mash before shaping them into balls. I thought it produced a rather interesting texture - different from the usual fish balls. There was a less refined, almost rustic, look, feel and texture to my fish balls.
Wanting to keep the taste of the fish balls as “pure” as possible, I added only a bit of salt water (rather than salt itself, as salt water, according to my mum – and I’ve learnt not to question her culinary wisdom on such things – enhances the texture and smoothness of the fish meat) and a little pepper to the meat. Then it was simply rolled into tiny bite sized balls. No flour or other binder was needed.
Next, I brought some chicken broth to a boil, added in some fresh veggie and tomato, and seasoned the soup to taste. When the vegetables were almost at the doneness I wanted, in went the fish balls. As they started to float to the top (indicating they were cooked), I let the soup come to a quick rolling boil, and quickly added in two lightly beaten eggs (seasoned with a dash of light soy sauce and pepper). I reduced the heat, and quickly but gently swirled the eggs to form smooth loose strands throughout the soup. Just before the eggs were fully cooked, I turned off the flame and allowed them to finish cooking in the residual heat, so that the egg texture would stay smooth.
Unfortunately, after removing the soup from the heat, I discovered that not all the fish balls were fully cooked through. Like I said, I was feeling lazy. So instead of removing the undercooked fish balls from the soup and cooking them again separately, I just plonked the whole pot back on the flame for another minute or two. The result? Somewhat overcooked eggs with a slightly “rough” texture (as you can see from the picture). They tasted fine. But I’m just picky sometimes about the eggs having a smooth, refined texture.
At this stage, this chunky concoction already made for a delicious stand-alone soup. But I wanted to make a full meal of it, and so while the soup was cooking, I also boiled some rice vermicelli in a separate pot of water. It’s best not to cook the vermicelli in the soup, as this tends to turn the soup "cloudy", and makes it that little bit less visually appealing. My laziness and hunger again dictated that I didn’t bother with the cold rinse for the bee hoon. Once it was cooked, and the soup was ready, I added the two together, and it was good to go. Time to eat!
Oh… and where’s the bee hoon in the picture you ask? Err… let’s see… it’s… here… ![]()
Copyright © 2004 Renee Kho. All rights reserved.
Please contact me for permission to copy, distribute or display any of the images or text contained in this article.
11:57 PM in Home Cook: Fish & Seafood, Home Cook: Rice, Noodles etc | Permalink | Comments (11) | TrackBack
Monday, February 16, 2025
Red Rice

After a gastronomic weekend, all I wanted was a light dinner tonight. Something easy on the digestive system. For me, this usually means a simple meal of rice and lots and lots of vegetables.
At home, I only eat red rice. Yes, the rice is naturally red, or more accurately, reddish black when uncooked, and red when cooked. It looks a little like the black glutinous rice used to cook pulot hitam (a dessert porridge of black glutinous rice cooked in sugar syrup and served with a dash of thick coconut milk), but it is completely different. This red rice has the flavorful nuttiness of (Western) wild rice, but with the soft fluffiness of regular white rice (if cooked right). I much prefer this red rice over brown rice too, as I find the latter to be rather “hard” and chewy even when cooked with plenty of water.
I cook the red rice as I would regular white rice… into the rice cooker, with just a tad more water… and it comes out soft and fluffy. No pre-soaking, no extra long cooking time.
It’s supposed to be good for you too, replete as it is with abundant B vitamins and folic acid. ![]()
I’m so used to eating this rice now that sometimes when I do eat white rice, I miss the nutty flavors and “bite” of the red rice. Food even tastes different when eaten with white rice. ![]()
[Unfortunately, the red rice is not available in Singapore. We buy ours from Brunei. It is also available in Sarawak and Sabah, and the rice is usually grown by the indigenous natives of these two Malaysian states.]
Tonight, we had three vegetable dishes, and this is one of my favorites…

Cauliflower stir-fried with tomatoes and carrots. What do I like so much about this dish? I love tomatoes. Especially when they have been cooked down, and are soft, tender and richly flavorful. I love the taste of the gravy, robustly flavored with the fresh tomatoes. Absolutely delectable when poured over steaming hot rice. I enjoy the natural tanginess and sweetness of the tomatoes. I just think it complements the cauliflower really well. The carrots give added color as well as a different texture and sweetness. It’s simple and it’s good.
Firstly, blanche, peel, seed then dice large ripe tomatoes.
Heat a wok or any other frying pan and add a little oil. Allow the oil to heat until the palm, when held a couple of inches above the surface of the pan, senses heat rising from the oil. Add minced garlic and chopped shallots, and quickly sauté until they are fragrant but not brown. Add the carrot slices, and after a quick sauté, followed by the cauliflower. After another brief sauté, add the seasonings: light soy sauce, salt, sugar, pepper and some hot boiling water or chicken/vegetable stock/broth*. Cover the pan, and allow the cauliflower to cook until it is slightly tender (approximately 5 minutes). Add the tomatoes, and re-cover the pan. Allow the tomatoes to cook down until soft and mushy, and partially dissolved into the gravy (approximately 5 minutes). Remove from the heat and serve.
[The cauliflower may alternatively be par-boiled in water first, so that the cooking time required during the stir-fry is reduced.]
This cauliflower-tomato dish is based on the standard “basic” vegetable stir-fry method, which can be used to sauté all sorts of vegetables and legumes, with variations only in the timing of the adding of different vegetables or parts of the vegetables; the cooking time; and the seasonings used.
The “de rigeur” steps are:
• heat pan
• heat oil, until slight warmth is detected at the center of the palm, when it is held a couple of inches above the surface of the pan
• sauté minced garlic, shallots or both (or sometimes just ginger eg for kai lan)
• add vegetables in stages, in the order of ease of cooking, with those with the longest cooking time going in first, such as the stems of green leafy vegetables, carrots and so on, followed by the leaves of the vegetables or other quick-cooking vegetables. This allows for even crunchiness in all the vegetables in the final dish.
• add seasonings (various combinations of light soy sauce, tiny bit salt, a little sugar, pepper, sometimes oyster sauce) together with some hot boiling water or broth/stock* once the vegetables have turned color
• cover the wok or pan, and allow the vegetables to cook until the pan cover is warm to the touch**
• uncover, remove from the heat and serve
For certain vegetables, such as kai lan, a little rice wine is added just before the vegetable is removed from the heat.
A slight variation to the routine is when sautéing beans or other long-cooking legumes. The beans are sautéed in the hot oil until their color has changed before adding the minced garlic. As the beans require a fairly lengthy cooking time, this will prevent the garlic from burning. Then, simply add the seasonings and cover the pan** as per normal.
* Chinese stir-frying of vegetables always involves the adding of a little water/stock - even in vegetable dishes that appear "dry" at the end – i.e. no gravy. This is true of both home and restaurant cooking. The amount of water/stock added will determine how much gravy, if any, the final dish will have. Adding just a little bit of water/stock, which will be absorbed during the cooking process, will result in a “dry” dish.
** This little trick was taught to me by my mum, who in turn learnt it from her mum. It’s a quick and easy way to know when the vegetables have been thoroughly cooked through without having to constantly lift the pan cover to take a peek, and thus disrupting the temperature in the pan.
Why do we add liquid and cover the pan? The reasoning is to quickly and thoroughly cook the vegetables in a very short time, and to maximize the heat in the pan. The Chinese are quite particular about having the vegetable being completely cooked through, and yet still crunchy. Just sautéing without adding liquid or covering the pan will generally result in a vegetable that is not completely cooked through and the "crunch" is different. And sautéing until the vegetables are completely cooked will result in rather unappetizingly yellowed vegetables. Adding liquid and immediately covering the pan and allowing the vegetables to cook through will ensure a nice green color plus well-cooked vegetables.
Note: Chinese stir-fries are usually done on a gas-stove, so perhaps the timing and the control of heat may need to be adjusted for an electric stove, and may require some experimentation. The level of crunchiness can also be adjusted to suit personal preferences.
Happy vegetable stir-frying!
Copyright © 2004 Renee Kho. All rights reserved.
Please contact me for permission to copy, distribute and display any of the images and text contained in this article.
10:40 PM in Home Cook: Rice, Noodles etc, Home Cook: Vegetables | Permalink | Comments (4) | TrackBack
Tuesday, February 10, 2026
Konlo Mee

I like noodles. Probably more than I like rice. Noodles can be stir-fried or deep-fried. They also come served in flavorful broths. But my favorite way of eating noodles is kon lo (or literally, “dry tossed” in Cantonese). This is Chinese comfort food. A plate of noodles that have been boiled in water, tossed with some light seasonings and topped with various toppings ranging from minced meat and fish balls to bbq pork or raw vegetables. Konlo noodles nourish not only the body but the soul.
First though, perhaps a word about the general genre of Chinese “dry tossed” noodles and the specific name “konlo mee”.
There are numerous variations of “dry tossed” noodles, not only from one region and dialect of China to another, but also from one overseas Chinese community to another. The differences come in the toppings or ingredients used to make up the dish; in the seasonings used; and in the types of noodles used. Northern Chinese noodle dishes tend to use wheat noodles whereas the Southern Chinese favor rice noodles. Hong Kongers prefer egg wheat noodles, while the Taiwanese, like the Northern Chinese use more hand-pulled wheat noodles. In South East Asia, just about anything goes! Further variations come in the shape and textures of the noodles – flat, round, thin, thick, soft and smooth or springy and chewy. Different noodles are used for different dishes.
The two most famous, or at least best known “dry tossed” noodles from China would be Sichuan’s Dan Dan Mian (noodles topped with spicy minced meat) and Beijing’s Zha Jiang Mian (noodles topped with minced meat in fried soy bean paste). Hong Kong has her Wantan Mein, while Taiwan has her cold noodle dish of hand-pulled noodles topped with shredded raw vegetables and either sesame or peanut paste.
Singapore, being the culinary melting pot that it is, has versions of all the above. Perhaps what could be considered more uniquely South East Asian would be konlo (dry tossed) noodles with minced meat or fish balls and fish cakes. Now, just to make things a little more complicated, konlo noodles are not called “konlo” in Singapore. One would be hard-pressed to find the term “konlo mee” listed on the menu boards in the hawker centers and food courts of Singapore. Minced meat “dry tossed” noodles go by the name “bak chor mee”. And fish ball noodles are called, well, fish ball noodles. Naturally. ![]()
The term “konlo mee” is (correct me if I’m wrong) pretty much an East Malaysian/Borneo thing. Taken from the Cantonese words for “dry tossed” (kon lo), it evolved into the English spelling “kolo” mee. It is mainly a dish of wheat noodles topped with minced meat (pork or chicken).
What then is the difference between Singaporean bak chor mee and Malaysian kolo mee? Quite a lot. It’s all in the seasonings used and the texture of the noodles. I am a HUGE fan of Sarawakian and Bruneian konlo mee, and I have not really been able to find a close enough version in Singapore. (I’ve written about my ongoing quest previously). The latter has chewier noodles, or what we call a “Q-Q” texture, and very often uses a seasoning sauce that includes tomato sauce (ketchup) and chilli sauce.
So, the terms “kolo mee” and “konlo mee” are, to me anyways, interchangeable. And I use the latter term to refer to “dry tossed” noodles in general as well as Malaysian “kolo mee”. Complicated I know.
Anyway, here are my home versions (one can come up with countless versions) of konlo or dry tossed noodles…
First off, preparing the toppings…
There are really no limitations as to what can go on top of the noodles. Whatever appeals to your palate at that moment in time would be a good guide. ![]()
It could be as simple as minced pork or minced chicken stir-fried with a little minced garlic, and seasoned with light soy sauce. It could be slices of store-bought bbq pork (char siew), or a few fish balls and fish cake slices. It could be leftovers from the previous night’s dinner!

When making konlo noodles at home, a lot of the time I like to make a dark soy sauce diced chicken “gravy” (above picture, top) for my noodles. If I’m wanting a vegetarian version, I cook an oyster sauce-rice wine mushroom topping. I prefer using Chinese dried mushrooms (above picture, bottom right), although sometimes I may use a mixture of mushrooms such as Japanese enoki and shitake mushrooms, together with round field mushrooms and so on. Occasionally, carrots add a dash of color (below picture, top right hand corner).

Diced Chicken in Dark Soy Sauce
I normally use de-boned chicken thighs, simply because I find brown meat more flavorful and I prefer the texture. However, breast meat is an easy substitution. After being diced, the chicken meat is marinated with 2 tablespoons light soy sauce, ¼ to ½ teaspoon sugar, ½ teaspoon sesame oil and around ½ tablespoon cornflour (this would be good for 4 pieces of thigh meat), and left to sit for 20-30 minutes.
In a little hot oil, quickly sauté some minced garlic and finely chopped shallots. Add the chicken, and give it a quick stir-fry. Once the meat has changed color, add 2 tablespoons of dark soy sauce, and a dash of pepper. When the mixture comes to a boil, add a little cornflour/water mixture to thicken the gravy. Bring the sauce to a boil again, and remove from the heat.
*Mushrooms or other vegetables may be added to the chicken for added interest, flavors and textures.
Oyster Sauce – Rice Wine Mushrooms
Most of the time I use dried Chinese mushrooms simply because we always have a bunch of them pre-prepped sitting in the freezer, and all I have to do is defrost a few, slice and I’m ready to cook.
Sauté some chopped shallots in hot oil, and add the thinly sliced mushrooms. Just a quick stir, and the seasonings go in: some light soy sauce, dark soy sauce (only a tiny bit, enough to give the gravy some color), oyster sauce, sugar, salt and pepper. All the flavorings are added according to personal taste preferences and can be readily adjusted or substituted. I find mushrooms cook really fast – at most 4-5 minutes, depending on the type of mushroom used. Any longer and they will become too mushy. Add a little cornflour/water mixture to thicken the gravy. Once the sauce returns to a boil, add some Chinese rice wine or white wine. Return it to a boil to burn off some of the alcohol. Ideally, it would be great to flambé the mushrooms upon adding the wine. That really adds to the flavor of the mushrooms. But I don’t know how to flambé, have never managed to do it properly and am generally wary of having flames leap into my frying pan!
Vegetable Accompaniment
I usually also have some green veggies to place on the side of the noodles, simply for the color. I like cai xin with small yellow flowers (see above pictures) a lot. But any green vegetable would do – regular cai xin (a.k.a. chai sim), kai lan or even spinach.
Bring a pot of water, seasoned with a little cooking oil, sugar and salt, to a boil, and add the vegetables. Remove from the heat once the desired tenderness is reached, drain and they’re good to go.
Alternatively, (if you are less lazy than me!), the vegetables can also be stir-fried with chopped garlic and seasoned with a little light soy sauce and pepper.
Crossing the Cold River
Next, the noodles. Any type of noodle can be used – flat rice noodles (kuay teow or ho fun), thin round rice noodles (mee sua or mian sian), flat wheat noodles (mee pok), round egg noodles, spinach noodles, carrot noodles, rice vermicelli (bee hoon) and even macaroni and other pastas.
The ideal way of cooking noodles is what I call the “three dip” method. Actually, I think there is a more eloquent name for it… something about crossing a cold river… but the poetic term eludes me for the moment.

Three pots of water are required. Two pots of boiling water, and one pot of cold (not iced) water. The noodles are first cooked in the first pot of boiling water (furthest left in picture). Once cooked, they are quickly plunged into the pot of cold water (furthest right). Finally, they are dipped into the second pot of boiling water (middle) to heat them through again, and then drained.
Why the need for this 3-step procedure? It enhances the texture of the cooked noodles, and also, quite importantly, prevents the cooked noodles from clumping together into a sticky mess. The first pot of boiling water cooks the noodles. It also “rids” the noodles of some of their alkalinity (from the alkaline water with which some wheat noodles are made) as well as the flour that sometimes coats certain types of noodles. The cold “bath” gives the noodles nice “bite” – a “Q-Q” texture. The final pot of boiling water simply heats the cooled noodles through again. We don’t want to put the noodles back in the first pot of boiling water with all the dissolved flour and alkaline water.
This method is used by all hawkers and restaurant chefs to cook all types of noodles. Even noodles that will be served in a soup are first cooked this way, and then added to the broth and heated through to allow the flavors to meld. This keeps the flavors of the broth “pure”.
Saucing It Up
Once cooked, the noodles are immediately tossed with the seasonings. This can be done on an individual serving basis or the entire batch all at once. I do the latter when I’m lazy and not inclined to offer diners any options. ![]() Otherwise, I’m quite happy to do it on a plate-by-plate basis, and one can thus actually vary the seasoning sauce according to the preference of each diner.
Otherwise, I’m quite happy to do it on a plate-by-plate basis, and one can thus actually vary the seasoning sauce according to the preference of each diner.
Again, the options are limitless. Here are just some of the combinations I use frequently:

For the mee sua (rice noodles) we had on the 7th Day of CNY, it was just some light soy sauce, some garlic oil (minced garlic sautéed in vegetable oil), a little bit sugar and a dash of sesame oil. This is “neutral” dressing for the noodles, and suits most people, unless they really dislike garlic in any amount.
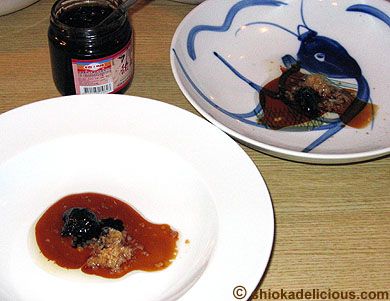
When I am tossing the noodles by individual servings, I use various sauce recipes according to the preferences of the diner. I just place the seasonings in each individual plate, and have them ready and waiting. The noodles are cooked in individual portions too, and as soon as they are drained, they go straight onto the plate, and I just toss them in the plate that they will be served in.
The picture above shows a sauce made up of some sweetened soybean paste (the little jar in the photo), light soy sauce, garlic oil and a dash of sesame oil.
Other sauce combinations I like using:
• Sweet dark soy sauce, light soy sauce, chilli paste (either home-made or store bought), garlic oil, and a dash of sesame oil.
• Sweet dark soy sauce, fish sauce and garlic oil.
• Sweet dark soy sauce, light soy sauce, garlic oil, dash of sesame oil and pepper.
• Ketchup, oyster sauce, dash of sesame oil and pepper.
• Ketchup, chilli sauce or chilli paste, oyster sauce, light soy sauce (tiny bit), garlic oil and a dash of sesame oil.
• Ketchup, chilli sauce, oyster sauce, fish sauce, sugar (tiny bit) and a dash of sesame oil.
• Hoisin sauce, oyster sauce, light soy sauce, garlic oil, dash of sesame oil and pepper to taste.
All sorts of combinations will work really. The possibilities are pretty much endless. Whatever takes your fancy… swap the seasonings around, add some, remove some, substitute some. It’s fun!
Looking East, Looking West
Finally, the plating.
The “eastern” way…
For informal occasions, once the noodles have been tossed in the serving plates, I simply top them with the meat sauces and vegetables, or the diners help themselves to the sauces. (The above is the mee sua from the seventh day of CNY again).
Or the “western” way…

Same mee sua (rice noodles), different style.
Any which way they come, I simply love “konlo” noodles!
Copyright © 2004 Renee Kho. All rights reserved.
Please contact me for permission to copy, distribute and display any of the images and text contained in this article.
11:30 PM in Home Cook: Rice, Noodles etc | Permalink | Comments (15) | TrackBack
Sunday, December 28, 2025
Simple Versatility

Fried beehoon (rice vermicelli) is a firm favorite and a common staple of informal parties and gatherings in this part of the world. It is a very simple yet versatile dish that also travels fairly well. That is why it is very often a dish of choice for picnics. Yes, picnics. Sandwiches and salads are not the “traditional” or preferred picnic food for most South East Asians. I grew up on picnic food like chicken curry eaten with fried beehoon or chunks of crusty bread. ![]()
For one of our Christmas gatherings, we had added a plate of vegetarian fried bee hoon to the rest of the food spread to specially cater for a couple of friends who do not include animal protein in their diets. [This version is not strictly vegetarian (in the Buddhist sense) though, as it uses garlic and onion.]
My style of cooking fried beehoon is rather different from that used in restaurants, which utilizes very high and intense heat (wok-hei) and large amounts of oil to impart a tasty smokiness to the beehoon and to prevent the rice vermicelli from breaking apart. If I was to attempt to fry the beehoon in the same way on a home stove, all I would end up with would be small broken pieces of the vermicelli, instead of nice elegant long and whole strands. The trick is not to stir fry the vermicelli at all…
For the vegetarian version, I used carrots, cabbage, cai xin (green leafy vegetable with small yellow flowers) and Chinese dried mushrooms (rehydrated by boiling them in water with a little oil added), all julienned. Any combination of vegetables can be used. French beans instead of the cai xin, or fresh shitakes instead of Chinese mushrooms for example. I usually just try to include a nice mix of colors (green, red, orange, brown etc) in the vegetables for more eye appeal.
All the vegetables (except the cai xin) are first sautéed in a little hot oil with some minced garlic, and seasoned to taste with light soy sauce, a touch of oyster sauce and pepper. Some hot water (approximately ½ cup) is then added and the pan covered to allow the vegetables to cook through. Once tender, the vegetables are removed from the pan and set aside. Next, the cai xin are sautéed in the same manner, with minced garlic, and seasoned with light soy sauce only. For cai xin, however, I covered the pan only very briefly, as this vegetable (like all other green leafy vegetables) will turn a very unappetizing yellow if covered for too long. This is also set aside.
For the rice vermicelli itself: this needs to be rinsed under running water before being used. I usually use about 2 ½ “slabs” or ½ packet of the vermicelli for a 4-5 person serving.
To cook it: some minced garlic and shallots are sautéed in hot oil, before vegetable stock (approximately 1¾ cups) is added to the wok, along with approximately 1½ to 2 tablespoons light soy sauce, 1½ to 2 tablespoons oyster sauce, ½ to 1 teaspoon sugar, a dash of sesame oil, a little Chinese rice wine and pepper. The stock is allowed to come to a boil, before the beehoon is added. And this is the key: the vermicelli should be tossed continuously, using a pair of chopsticks, until all the stock has been absorbed. Care needs to be taken not to attempt to stir fry or sauté the vermicelli, as this will cause the strands to break into tiny pieces. Stock is continuously added until it is all absorbed and the vermicelli is at the desired tenderness. It’s a bit like cooking risotto I guess. From past experience, I find that about 1¾ cups of stock is generally needed for 2½ slabs of beehoon to achieve the ideal tenderness, and I normally add the full measure of stock right at the start, and do not need to add further amounts after that. However, the quantity of stock required could possibly vary with different makes of vermicelli and possibly even ambient humidity.
After the beehoon has been cooked through, all the cooked vegetables are returned to the wok, and tossed with the beehoon to mix well. At this point, it is possible to add more seasonings if the taste is still not quite there yet.
Very often, fried beehoon is served with the side condiment of sliced vinegared green chilli in light soy sauce. One can also sprinkle some crispy deep fried shallots slices over the top for an added tasty crunch.
Variations:
All types of ingredients, according to personal desires or just whatever is in the fridge/pantry, can be used in cooking fried beehoon. Any of the following, in any combination can be used:
• Strips of char siew (roast pork)
• Cooked fresh prawns
• Egg omelet (lightly beat a few eggs with a fork, season with pepper and light soy sauce, pan-fry into a thin omelet, and cut into strips)
• Strips of chicken (marinade with light soy sauce, a little sugar, a touch of sesame oil, and tiny bit of cornflour, sauté with minced garlic and shallots and set aside)
• Strips of tau kwa (pressed firm tofu) (saute with minced garlic and some seasonings)
• Strips of tau pok (deep fried tofu pockets)
• Hae bee (dried baby shrimps) (saute in a little hot oil with some minced garlic until fragrant - sambal or chilli paste can also be added for sambal hae bee)
• Strips of fresh red chilli
• Chicken stock instead of vegetable stock (I usually prefer using chicken stock actually, if not required to make a non-animal-protein version, as I feel it provides fuller flavors than vegetable stock)
• Pretty much anything that takes your fancy…
Just toss the various cooked ingredients with the cooked vermicelli right at the end, before serving.
Happy Fried Beehoon-ing!
Copyright © 2003 Renee Kho. All rights reserved.
Please contact me for permission to copy, distribute or display any of the images and text contained in this article.
04:54 PM in Home Cook: Rice, Noodles etc | Permalink | Comments (6) | TrackBack
Saturday, December 13, 2025
Fried Rice Paradise

YAY! IT’S FRIDAY! ![]() (or more accurately, the wee hours of Saturday). It’s been a long, long week, and boy! am I glad to see the weekend. When I got home at 9.30pm tonight, tired and starving, I found freshly cooked fried rice waiting for me! Waaw..wow! Plus, I had a choice of not one, but two types of fried rice! Double waaw..wow! Ah! The luxury of choice.
(or more accurately, the wee hours of Saturday). It’s been a long, long week, and boy! am I glad to see the weekend. When I got home at 9.30pm tonight, tired and starving, I found freshly cooked fried rice waiting for me! Waaw..wow! Plus, I had a choice of not one, but two types of fried rice! Double waaw..wow! Ah! The luxury of choice. ![]()
I luurve fried rice. It’s such a versatile dish. I can add almost anything to it. And just by changing one or two, or even all the accompanying ingredients, the taste of the dish changes and evolve. It’s pretty much a “one dish meal”… it has vegetables, meat, egg and rice all in one dish. It’s easy to cook… and uses just one wok/pan, so there’s minimal clean-up (rather important factor for a tired cook) ![]() It’s bright, colorful and tasty!
It’s bright, colorful and tasty!
Whilst a simple dish, there are actually many, many different methods of cooking it. I personally don’t think there is one method that is more “correct” than another, or better than another. It’s pretty much down to the chef’s preference and style.
Fried rice connoisseurs will probably say that the dish can only be cooked with leftover, overnight rice, which has less moisture than freshly cooked rice. And on the whole, I would agree with this. After all, the dish itself evolved from cooks wanting a way to utilize leftover rice, and so threw in some fresh meat and vegetables (or even leftover meat and vegetables) to create a brand new, freshly cooked meal. However, we make fried rice using freshly cooked rice all the time (simply because we never have enough leftover rice to use), and the dish still tastes great.
Some people would say that if planning to fry freshly cooked rice, it would be best to add a little salt to the water in which the raw rice is cooked, so that it produces a “dryer”, less soft grain, or, to air the rice after it is cooked and before frying it, to dry it out a little. Again, I understand the basis of these tips, and they probably work well, but I’ve never used them, and I don't think it has affected the taste of our home-cooked fried rice. So, I guess it is all about experimenting until you find the method, tastes and textures you are happiest with.
One thing I do find missing in home-cooked fried rice though is the “wok-hei”, that all important, but rather elusive element. Literally translated from Cantonese, it means “energy of the wok”. It’s that extra fragrance and aroma that the rice has when cooked with extremely high heat and intense flame, which can only be achieved with industrial hobs of restaurants. Then again, not all restaurant-served fried rice has wok-hei. It’s all down to the skill of the chef. ![]()
One of my favorite versions of fried rice is the salmon fried rice – using hoisin-marinated salmon, with carrots, cucumber, egg, black olives, and sometimes a tiny bit of lemon zest. I find the olives complement the salmon rather well, and give a sort of Mediterranean feel to the dish. I normally use dried black olives, very, very finely minced. The lemon rind adds a refreshing and tangy counter-balance to the olives and salmon. I prefer Japanese cucumbers for more crunch, but all types work just as well. Or, it can be substituted with diced long beans, green peas or anything that's green!
The way I cook fried rice, is the way my mum cooks fried rice. Each ingredient is sautéed separately, before being brought together with the rice at the end. The salmon is diced and marinated in hoisin sauce, and then sautéed with garlic and shallots (please see next post for recipe). The minced olives are also sautéed with some garlic. The diced carrots are just sautéed in a little oil to soften and cook. I like to leave the cucumbers raw and crunchy. The eggs (2-5, depending on amount of rice and how much egg you like in the rice) are lightly beaten and seasoned with light soy sauce, salt, sugar and pepper.
Finally, to bring all the ingredients together: fry some minced garlic in hot oil, and add the eggs. Just as the eggs begin to solidify, add the cooked rice, and stir-fry. I personally like to see the eggs in my fried rice, so I like the eggs to be in small pieces throughout the rice, which this method will produce. Others prefer the eggs to “disappear” into the rice – i.e. the eggs coat each grain of rice and are not seen. In this case, the rice would have to be mixed with and be evenly coated by the eggs before being added to the garlic.
The rice would probably need to be sautéed for a good 10 minutes or longer, depending on the strength of the flame. I’ve been told that the gauge for doneness of the rice is when the grains of rice start “jumping” and doing a merry dance in the wok. ![]() I’ve never achieved this, probably for a couple of reasons: 1) we normally cook large batches of fried rice (enough to feed probably 10 people), as opposed to the individual portions cooked in restaurants, and with that much rice in the wok, there just ain’t enough space for them rice grains to start doing the jiggle wiggle, you know what I’m saying? 2) it requires intense heat and high flame (the wok-hei again) to achieve this rice dance performance, either that or one has to stand over the rice and fry them for a good ½ hour or more to achieve it. And frankly, I’m too lazy to do that. And hey, I still think (and so does my family) that the fried rice hasn’t suffered too much from the dance deprivation! But I digress…
I’ve never achieved this, probably for a couple of reasons: 1) we normally cook large batches of fried rice (enough to feed probably 10 people), as opposed to the individual portions cooked in restaurants, and with that much rice in the wok, there just ain’t enough space for them rice grains to start doing the jiggle wiggle, you know what I’m saying? 2) it requires intense heat and high flame (the wok-hei again) to achieve this rice dance performance, either that or one has to stand over the rice and fry them for a good ½ hour or more to achieve it. And frankly, I’m too lazy to do that. And hey, I still think (and so does my family) that the fried rice hasn’t suffered too much from the dance deprivation! But I digress…
Once the rice is “ready”, add the seasonings. The standard would be salt and pepper. Or alternatively, fish sauce is tasty too. Finally, add all the other pre-prepared ingredients (fish, vegetables) and sauté to mix. Ta-da… done!

The other version of fried rice that was cooked tonight, and which I haven’t actually had in a looong time, was cooked with luncheon meat, corn kernels, olive, carrots, coriander (or parsley) and eggs. Yum! The diced luncheon meat was sautéed till brown and crispy. The olives and carrots were sautéed as above. And the rice fried in the same way, before adding all the ingredients.
Other versions of fried rice which I really like:
- with prawns
- with salted fish
- with Chinese sausages “lap cheong” (I think Italian Chorizo would work fantastically too)
- with Yunnan ham or any other type of ham and pineapple (yes, pineapple)
- with a sunny-side-up fried egg on top, so that when I break the runny yolk, it cascades over the rice! ![]()
- all versions fried with sambal chili ![]()
It's all about balancing tastes, colors and textures. Fried rice is just a great dish for letting your taste-desires, creativity and instincts lead you… on a magical mystery taste tour!
Happy rice frying!
Copyright © 2003 Renee Kho. All rights reserved.
Please contact me for permission to copy, distribute or display any of the images and text contained in this article.
05:11 AM in Home Cook: Rice, Noodles etc | Permalink | Comments (2) | TrackBack