Thursday, October 28, 2025
Dang! I CAN Make Biscuits After All!
Those who know me also know about my string of non-successes (oh, alright, my unbroken chain of dismal failures - - there, I’ve said it… dismal failures… dismal failures… hah! how liberating that feels) in trying to make American-style biscuits.
From what I understand, American biscuits - - really good American biscuits that is - - should be soft, fluffy and light, with a tender crumb. Well, the biscuits I have made so far have been… umm, let’s just say, likely to cause at least minor head injuries requiring medical attention, if thrown at anyone in a fit of rage. Hmmm… maybe that’s why all my friends have been unfailingly polite about my failed biscuits, showing me loving support and offering wonderful words of encouragement : it’s not me, it’s the recipe.
Well, maybe. But at most, that’s only part of the story.
The tragic thing about this sad tale (but oh, it has a very happy ending though, so read on…) is that I actually know where I go wrong each and every time. You see, I have a problem (is this beginning to sound like some confessional session at the shrink?). I like to manhandle my biscuit dough. Yes, I am a manhandler. I admit it. I simply cannot resist. It is almost compulsive. I don’t like wet, sticky, messy, lumpy dough. And so, I manhandle; I can’t leave well alone - - I expect my biscuit dough to be all suavely smooth and sensuously pliable.
The problem with this though is that biscuit dough is powerfully resistant to being shoved around and made to be something it is not meant to be. It gets resentful, sulky and moody. It huddles up into a tense mass and sits there like some dense and heavy rock, all gloomy and petulant. In return for my callousness with its feelings, it refuses to rise to the occasion, and quite literally lets the air out of my biscuit-baking endeavors. I am sure it has been nothing but sweet revenge each and every time for the biscuit dough.
But… my time has come. My biscuit ship has come in. You may insert any clichéd proverb you desire, but the bottomline is, I have now found my perfect biscuit partner. Oh! The delirious joy! The ecstatic celebration! The triumphant sense of achievement. And yes, the deep, deep sense of fulfillment.
Several months ago, a dear friend sent me a buttermilk biscuit recipe that she had seen from an issue (which one I do not know, I’m afraid) of Cook’s Illustrated. In her email, my friend wrote of the ease with which she achieved incredible results from the recipe. After gushing for at least one whole paragraph about how good these buttermilk biscuits tasted, she added: “You just have to try this recipe. Success is guaranteed. If even I, a non-baker, can achieve stunning results from this, you definitely can too. Trust me.”
Now, there are three words in the English language that tend to have a “reverse-psychology effect” on me - - “trust me” and “guaranteed”. As soon as I hear those words, I am instantly wary ; I immediately anticipate obstacles and detours ahead. Perhaps it is an instinct honed from too many years of hearing business people and consultants say the very same words to me. Who knows.
So I filed the recipe and never thought seriously about trying it. I had decided I was probably “just not cut out” to make biscuits. I mean, there must be some things I can’t do, right? ![]()
![]()
But last week, I had ¾ of a carton of buttermilk to finish before it passed over into uselessness. Out of the blue, I suddenly remembered this recipe. Maybe, just maybe, it was worth giving the recipe a go-around. After all, what did I have to lose? If I didn’t make anything with the buttermilk, it would have all gone down the drain a few days later anyway. And if this recipe was successful, I would have delicious biscuits to eat. If it wasn’t, well, it wouldn’t have mattered - - it would have been pretty hard to dent my biscuit-ego any further. Besides, I could always do with some new additions to my collection of door-stops.
As it turned out, the biscuits were fantabulous! They were so seriously good, I can’t tell you!
Just how good? Well, I made them on a Saturday afternoon, intending to serve them (if I succeeded in making them) for Sunday brunch (I know, I know, biscuits are best fresh from the oven, but Sunday is my “sleep-in” day, and I wasn’t about to forsake extra sleep for biscuits), but they never made it to Sunday. In fact, they didn’t even make it past 30 minutes after they came out of the oven! They were that good!
These are easily the best biscuits I have ever tasted, not that I have tasted that many biscuits. But I have tasted enough bad and not-so-good ones to know a winner when I taste one.
The recipe is incredibly easy and straightforward, and… the best part is, it solves my “manhandling” issue too! It doesn’t require me to roll out the dough (that is the step over which I always trip), nor does it asks that I drop messy, gooey, wet lumps of dough batter onto a baking sheet, and thus creating in me an overwhelming urge to fiddle and overwork the dough. The recipe provides the simplest step ever to achieve balls of dough that are suavely smooth on the surface and that are silkily dry to the touch. Just what I have always been looking for in a biscuit dough! And I don’t even have to manhandle it to get it to be like that! Woo-hoo. This is biscuit heaven!
Buttermilk Biscuits
[taken from Cooks’ Illustrated]
Makes 12 biscuits
Biscuit Dough:
2 cups (10 oz) unbleached all-purpose flour
1 tablespoon double-acting baking powder
½ teaspoon baking soda
1 tablespoon sugar
1 teaspoon salt
4 tablespoons cold unsalted butter, cut into ¼-inch cubes
1½ cups cold buttermilk, preferably low-fat
To Form and Finish the Biscuits:
1 cup (5oz) unbleached all-purpose flour, evenly spread out over a rimmed baking sheet
2 tablespoons unsalted butter, melted
• Adjust oven rack to the middle position, and heat oven to 500F / 260C. Spray a 9” round cake pan with nonstick cooking spray, and set aside. Generously spray the inside and outside of a ¼ cup measure with nonstick cooking spray. Set aside.
• Place the flour, baking powder, baking soda, sugar and salt into the bowl of the food processor. Pulse to combine (about six 1-second pulses).
• Scatter the cold butter cubes evenly over the dry ingredients, and pulse until the mixture resembles coarse cornmeal (about eight to ten 1-second pulses). Transfer mixture to a medium mixing bowl.
• Add the buttermilk to the dry ingredients and stir with a rubber spatula until just incorporated. [Yes, the dough will be very, very wet, and rather lumpy, but do not overmix. Even I could resist the urge to overmix this time, so you can too.]
• Using the greased ¼ cup measure, and working quickly, scoop a level amount of the dough batter and drop onto the flour on the baking sheet. [You may require a small spoon to help pull the wet dough free of the cup.] Repeat until all the dough has been measured out, and there are 12 evenly sized mounds of dough on the baking sheet.
• Gently roll each piece of dough in the flour on the baking sheet until all sides are lightly coated with flour. Gently pick up the piece of dough and very lightly shape it into a rough ball. [They feel gorgeous in the hand by the way… a little like the softest muah chee you have ever come across.] Shake off any excess flour and place the dough into the prepared cake pan. Repeat with the remaining dough.
• Arrange 9 of the dough pieces around the perimeter of the cake pan and the remaining 3 in the center. Brush the tops of the dough with the hot melted butter, taking care not to flatten them.
• Bake 5 minutes at 500F / 260C. Reduce the oven temperature to 450F / 230C, and continue baking until the biscuits are a deep golden brown - - about 15 minutes more.
• Let the biscuits cool in the pan for 2 minutes before inverting onto a rack. Turn them right side up, cool for 5 minutes longer [or not; just as we didn’t], then break them apart and enjoy!
Note:
• I didn’t glaze the biscuits with the melted butter ; I opted instead to spritz them generously with cooking spray. They colored beautifully. However, using the melted butter would have given the biscuits an even headier, more scrumptious aroma than they already had. It’s a personal choice as to which you prefer.
• Given how much my family loves crusts, I used a dark cake pan for the biscuits. If a thinner, more tender crust is preferred, use a regular (light-colored) cake pan.
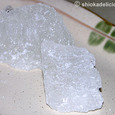
These biscuits were gorgeous! Standing tall and proud, they were fluffy and feathery light, just as I dreamt they would be.
The crumb was beautifully tender with an almost delicate mouth-feel. The wonderful buttery taste and aroma were rather nicely pointed up by the gentlest of salty overtones. Awesome!
For my mum, who had never tasted a “real” biscuit before this (you can’t possibly consider my numerous failed attempts as “biscuits” can you now?), it was definitely love-at-first-bite; she was completely smittened. Even the men, who did not usually indulge in muffins, scones and such like, loved the texture and taste.
Someone mentioned that the biscuits tasted sort of like a “cake-English scone-American muffin-English muffin” cross. Boy! That description was enough to give any biscuit a complex! But he was right. And it was a curious blend of textures that worked exceedingly well.
The best part for us was the golden crusts - - all crisp, crusty and aromatic. In fact, everyone ended up “fighting” for the biscuits that encircled the edge of the cake pan; the ones with the most crust.
While everyone else wolfed down the biscuits as they were - - plain, unadorned and piping hot from the oven, I tried mine with some wild blueberry jam, and it was… what can I say? Sublime!
I’ll definitely be making these biscuits a lot in the future. How can I not? I really, really enjoy them, and they are such a doddle to put together. Already I can think of some variations I will love to try out : I think a zippy, zesty orange-flavored one will be lovely… especially with the four citrus jam that I have sitting in my fridge. I also can’t help but feel these biscuits will make a great accompaniment for curry - - instead of using the standard French bread for moping up all the delicious gravy, I think these biscuits will do a fantastic job. Imagine… vibrantly colored biscuits (made from buttermilk that has had some saffron infusing in it overnight) that are lightly spiced with a touch of turmeric, coriander, cumin and maybe even some chopped fresh coriander. (Sorry, I know such a combination may be quite an affront to the American mind and the tradition of the American biscuit, but I can’t help but feel it will work well. After all, the Americans also have herbed versions of biscuits, albeit spiced up with “Western” herbs rather than Asian ones.)
And there you have it. I CAN make biscuits after all! All that I needed was a truly good recipe, and that is what this one from Cooks’ Illustrated is. I have bought issues of the magazine on and off in the past, but have never tried any of the recipes. Now, I’m almost tempted to run out and by their book Baking Illustrated!
Oh! You really should try this biscuit recipe. It’s so easy and so unbelievably good. And success is guaranteed. Trust me. ![]()
Copyright © 2004 Renee Kho. All Rights Reserved.
Please contact me for permission to copy, publish, distribute or display any of the images or text contained in this article.
09:32 PM in Home Baker: Lighten Up! Muffins, Scones etc. | Permalink | Comments (6) | TrackBack
Tuesday, April 13, 2025
A Scone Scorned, A Muffin Maketh?
I’m really wishing my body clock will come home soon! Well, it was another night of weird sleeping patterns, and mad middle-of-the-night baking frenzies. Fell asleep before 8.30pm, and woke just before 1.00am. And despite my darnest efforts, no further sleep would come. I was bored, I was restless. I opened the fridge door a dozen times, wanting to eat, not wanting to eat. Then I saw it. The expiry date on the buttermilk carton – the same carton of buttermilk that has been sitting in my fridge since before the trip. Okay, it had given me fair warning. It was about to cross over into buttermilk heaven pretty soon. Time to swing into action. 4.45am. Perfect time for a little baking, no?
Looney Spoons and Crazy Plates (those are cookbooks by the way, in case you missed the previous post – and not wacky cutlery and quirky flatware ![]() – not that I don’t have some of those as well
– not that I don’t have some of those as well ![]() ) were still lying on the kitchen table from last night’s kitchen escapades. A quick flip through the back index pages… um… let’s see… under “buttermilk”… aha! Cranberry and orange scones. That sounded mighty delicious!
) were still lying on the kitchen table from last night’s kitchen escapades. A quick flip through the back index pages… um… let’s see… under “buttermilk”… aha! Cranberry and orange scones. That sounded mighty delicious!
Only problem… I didn’t have any cranberries on hand. Oh, but I did have raisins. I know, not quite the same as the refreshing tartness of cranberries. But hey, raisins would be nice too. Hmmm… raisins and orange? That didn’t sound right. Raisins and cinnamon? Bingo. So, I ended up substituting the two key flavors which defined the recipe! Hmmm… that was a good start.
While I was gathering the rest of the ingredients together, I started to have cravings for traditional English scones. This recipe was for American-style scones – which are usually made using what I call the “muffin method” of combining all the dry ingredients together, combining all the wet ingredients together, and then combining the wet and the dry with each other. But instead of using muffin pans, the dough is shaped into a large round disk and cut into wedges before being baked. English scones on the other hand are more like enriched American biscuits – made richer with eggs and lots more butter or shortening. The “rub-in” method, where the butter or fat is rubbed into the flour to resemble coarse breadcrumbs before the liquids are added, is usually used for English scones.
Since I did not have any buttermilk-using English scones recipes on hand, American scones it would be.
Buttermilk Raisin Cinnamon Scones
2 cups flour
1/3 cup packed brown sugar
2 teaspoons baking powder
¾ teaspoon baking soda
1 teaspoon ground cinnamon
½ teaspoon salt
1 cup + 2 tablespoons buttermilk
1/3 cup raisins
2 tablespoons butter, melted
½ teaspoon vanilla
1 egg
1 tablespoon water
Sift the flour, baking powder, baking soda, cinnamon and salt together. Combine well with the sugar, and set aside.
Whisk together the buttermilk, melted butter, vanilla and raisins.
Add the wet ingredients to the dry ingredients, and stir until a soft dough is formed.
From past experiences with this cookbook, I have found its recipes for scones and biscuits tend to produce rather wet and tacky dough – a dough that will not be shaped or rolled without being fairly generously floured and lightly kneaded. And this always overworks the dough, producing insipid creations.
So, instead of trying to shape the dough into two round flat circles and cutting them into wedges, as instructed by the recipe, alternatively drop the dough by the heaping tablespoonfuls onto the greased baking sheet, to create individual scones. Then, using dampened fingertips, gently shape each scone into ¾” thick rounds.
Lightly beat the egg together with the 1 tablespoon of water, and glaze the tops of each scone using a pastry brush.
Bake at 205C or 400F, for about 15-17 minutes, until the scones are puffed up and golden.
Serve warm.
Makes 12.
Note:
An alternative to baking the dough on a baking sheet would be to use a muffin pan. This would also help give the scones better height and more uniformity of shape, compared to the free-form shapes obtained from a baking sheet.
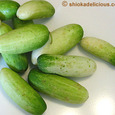
The scones did spread ever so slightly during the baking, but still had fairly good height…
Sorry, I couldn’t resist posting this picture. I thought it resembled “something” and looked rather “naughty” ![]() . Ahem… don’t mind me, I’m just feeling a little silly from lack of sleep.
. Ahem… don’t mind me, I’m just feeling a little silly from lack of sleep.
The scones’ texture and crumb were sort of a cross between an American scone and an American muffin, with a touch of the English muffin. It was tender and fluffy, and yet moist and slightly dense at the same time.
The family seemed to like it. I went back to bed at 6.30am, having left the scones to cool on wire racks. I woke up again at 11.00am to find that the family had devoured three quarters of all the scones for breakfast! They figured they should at least save three for me, since I had made them. How thoughtful! And I have to say, they were pretty good, especially for something so low fat. They may not have looked terribly attractive. I admit, they were not the most elegant and refined-looking scones you’d have ever seen. But they tasted good. I had all the remaining three for brunch… one on its own, with no embellishments. Nice.
I had one the traditional English scone-eating way… albeit slightly adapted…
I didn’t have clotted cream, nor did I have any whipping cream to whip. (Heh! Boy! My English is in top form today, isn’t it?) So, I made do with ready-whipped light cream – those that come in those aerosol canisters, the type for making café mochas and iced lattes. Yes, that type. Don’t scrunch your nose. It worked. Rather well at that. Added a nice dollop of strawberry preserves with chunks of real fruit. Fabulicious!
And of course, I had to have the third with my (still) current favorite flavor of the month… Hainanese kaya…
Very, very delicious!
Copyright © 2004 Renee Kho. All Rights Reserved.
Please contact me for permission to copy, publish, distribute or display any of the images or text contained in this article.
02:21 PM in Home Baker: Lighten Up! Muffins, Scones etc. | Permalink | Comments (7) | TrackBack