« July 2004 | Main | September 2004 »
Tuesday, August 31, 2025
Giving KFC a Run For Its Money – Maybe
There are just some days when, at the mere thought of having to fire up the wok and rustle up some dinner, you can immediately feel the onset of a headache. Inwardly you groan and drag your emotional feet. You would do anything to not have to cook…
Your heart is tempted… oh so tempted… to just step into the nearest fast-food joint and pick up a couple of burgers…
But wait!
You don’t have to cook… still get to eat your burgers… and still feel virtuously healthy…
How?
Well…
You make your own burgers…
Wait. Where you’re goin’? Come back. I haven’t finished yet.
C’mon. Bunging something into the oven, and cutting open a packet of pre-made sauce can hardly constitute cooking. Right? And there really is only just the one pot and one baking sheet to wash. Promise. (Okay, except for the plates. But that’s not too bad, surely.)
Some time ago, the ads for KFC’s seasonal offering of Satay Burger were screaming out from print and screen media left, right and center… cajoling, nay, “demanding” that I try their special concoction of “juicy, tasty” (their words, not mine) chicken topped with spicy, peanutty satay sauce, and sandwiched between a soft, fluffy hamburger bun. But I steadfastly refused to partake in all that greasy and oily deep-fried-ness. Besides, since when had real-life burgers ever come any where close to those depicted in the advertisement photos? Yet, it sounded like a wonderful idea… crispy chicken with spicy, nutty sauce…
Okay, I’d make my own then. But no deep-fried chicken. This would be the perfect time to finally try out the oven-fried method that I had read about on Owen’s site some time back and had been meaning to attempt.
The picture in my mind looked and sounded good… whole filets of boneless chicken thigh, moist, juicy and succulent from being marinated in buttermilk, crisply coated with panko and tastefully paired with the deep, intensely rich flavors of satay sauce. And it couldn’t be easier.
I don’t know about you, but I usually know in the morning, when I start my day, that I’m going to be feeling lazy about cooking that evening. Correction. Actually, I know the night before that I’m going to be feeling lazy about cooking on the evening after. I call it the “art of laziness”! And I think I’ve mastered the art form pretty well – right down to all the fine details!
So, this is what you do when you feel an episode of “artistic laziness” setting in: just before going to bed the night before, take out several boneless chicken thighs (you can use breasts if you want; I’m okay with that) from the freezer and pop them into the fridge to defrost overnight.
[De-boned chicken thighs are some of the greatest things to keep on hand in the freezer at all times; so incredibly useful and versatile. We usually buy a couple of dozen thighs and have the poultry guy filet them for us. Once home, they are placed in a single layer in freezer bags, and frozen. Whenever we need some chicken meat for stir-fries or any other dish really, we simply break off and defrost just the number of chicken thighs we need. They can be diced and sautéed with vegetables, used in green curries and all sorts of dishes. Really, very convenient indeed.]
Anyway, the next morning, simply and quickly trim away the skin (or just keep it on, if you prefer) and any excess fat. Oh alright, my house-help does this for me, but it is still a relatively brief and painless process. Then, it’s just another few minutes to put the marinade together. I used (for four chicken thigh filets) two whole cloves of garlic, lightly bruised; about an one inch knob of ginger, cut into rough chunks and bruised; a small bunch of fresh coriander (cilantro / Chinese parsley), roughly chopped; about three tablespoons of light soy sauce; a generous sprinkling of ground white pepper; and enough low fat buttermilk to thoroughly coat all the chicken.* Mix well, plonk it into the fridge, and leave to macerate while you go about your day. And by the time you get home in the evening, the chicken is all moist and juicy, and ready to be cooked.
[* I kept the seasonings very light as the satay sauce packs a powerful taste punch. But if serving the “fried” chicken on its own, feel free to add a variety of herbs (dried or fresh), paprika or any other flavorings that you may fancy. No rules here at all.]
In the evening, it is just a simple matter of pre-heating the oven to about 200C (400F) and removing the chicken from the fridge to allow them to come back to room temperature. That gives you 15-20 minutes or so to change into comfy, slouchy home clothes, to make yourself a nice warm drink (or a stiff, highly alcoholic one, if that is your preferred poison), and to just relax a little before putting the dinner together. Once you are sufficiently soothed, pour some panko Japanese breadcrumbs (I find these to be one of the most useful things to have a bag of, sitting in the freezer at any one time; they store well there, are truly great as coating for all sorts of dishes, or even as a binder, and are way better tasting than the insipid, stale pre-made regular breadcrumbs that are sold in the supermarkets – plus, who has the time to blitz up some freshly made breadcrumbs whenever the need arise, right?) into a shallow dish.
[Again, if not serving the chicken with a strongly flavored accompaniment like satay sauce, feel free to season the panko with dried herbs, salt, pepper or even Old Bay Seasoning.]
Take another sip of your drink as you grab a baking sheet and coat it liberally with cooking spray (or, if preferred, with about 2-3 tablespoons of vegetable cooking oil). Remove the chicken, piece by piece, from the marinade, allow any excess buttermilk to drip off (you don’t want the chicken too wet and thus making the breadcrumbs all soggy), and scrape off any bits of coriander that may be sticking to the meat. Place the filet in the panko and coat evenly on all sides before putting it onto the greased baking sheet. Once all the chicken is ready, spray the meat surface with a light layer of cooking spray. (I forgot this time, but it would be a good thing to do.) That’s it. Into the oven they go, for about 15 minutes or so.
Meantime, rustle up the satay sauce. This is as simple as simple is. Grab a packet of pre-made, store-bought satay sauce. (This time, instead of using my regular version from the Malay lady at Redhill Market, I decided to try out a new offering that I spotted at NTUC Supermarket the other day…)
Pour the contents of the entire pack into a medium pot, add just under one cup of hot water, and stir to combine. I think I used just under one cup of water, I can’t be too sure; I was just adding it in dribs and drabs until I got the desired consistency. The package label recommended about 1¾ cups of water, and that would have given a fairly liquid sauce, which would be great for things like satay bee hoon (rice vermicelli) or other dishes. For the burger, I wanted the gravy relatively thick and chunky – something that would stay in the bun and not ooze out all over the place.
Allow the sauce to come to a gentle boil, taste it and adjust the flavorings according to personal preferences. I added (as I usually do, to any store-bought satay sauce) a small chunk of gula melaka (palm sugar), a tiny dash of light soy sauce and a fair bit of ground peanuts (I like my satay sauce nicely chunky and highly redolent of peanuts.) Do whatever it is that pleases you. Let the gravy return to a boil, and you’re done. That’s it. And it takes all of 4-5 minutes. Painless.
This brand’s offering is actually very good. Note the nicely authentic, tasty and required layer of chilli oil rimming the gravy. The flavors are punchy, with just enough spicy heat – the taste is fairly suave, rounded and smooth. Not bad at all. I like it.
[Since you are at it, it’s an useful idea to make plenty of extra gravy. Pop the leftovers into the fridge, and it can be the basis for a scrumptious lunch the next day: simply reheat the gravy, add a little more water if necessary to bring it to the correct consistency, and pour it over some cooked rice vermicelli (bee hoon) to create the uniquely Singaporean dish “Satay Bee Hoon”. Add some cubed tau kwa (firm bean curd) or tau pok (fried bean curd skin), shredded chicken meat, blanched kangkong (water spinach), sliced hard boiled eggs or whatever you have on hand really – there’s no need to worry greatly about authenticity or creating unnecessary work for yourself. And lunch can be ready within minutes. Or, chop up various vegetables and make the Indonesian salad gado-gado, using the satay sauce as dressing. Extra gravy can also be used to stir-fry chicken or beef for a dinner dish. Of course, needless to say, it is also great with satay.]
Okay, you still have many minutes more before the oven timer goes off. So, busy yourself with cutting up some cucumber (I like the dark green Japanese variety, but any type will do) into thin slices. And whilst you have the knife and chopping board out, cut more cucumber into medium cubes, together with a few lush, ripe fresh tomatoes, a bunch of fresh coriander, and a couple of shallots or red onions (whichever you have on hand). Place all the diced vegetables into a large bowl, toss with some rice vinegar (or lime juice), a couple of teaspoons of extra virgin olive oil, some sugar, pepper and salt to taste – and for me, a couple of tablespoons of Thai chilli sauce… and you have a refreshing salsa to go with the burgers.
If you want to get really fancy (and go one up on KFC), prepare some onions to go into the burgers too. Slice one large yellow onion into rings, and sauté in a little bit of oil until soft, translucent and barely colored. No need for seasonings or flavorings; it’ll all come from the satay gravy.
Yep, some of mine got a little charred – I was momentarily distracted by something far more interesting than frying onions. But hey, the charred bits were great – giving a wonderful smoky flavor to the onions.
Oh, alright, so making the onions will mean another pan to wash. It isn’t necessary to do the onions; KFC didn’t, and I really don’t think the burgers missed them. However, I won’t deny that they do add a rather nice sweet and crunchy touch to the burgers. Just do as you please or feel up to.
Right on cue, the oven timer goes off. Yank the chicken out, and carefully flip them over**. Coat the freshly exposed side with more cooking spray and pop the filets back into the oven. ***
[** Take care when doing this. There is a tendency for chunks of the panko coating to be left behind on the tray – as I found out. Probably, the next time, I will want to bake the chicken on a rack; this will help keep the panko crust intact.]
[*** At this point, I suddenly decided to stop baking the chicken and to broil them instead. They were pretty much cooked through already, and just needed more coloring and crispiness on the crust. So, I switched the oven to “grill” mode, popped the chicken back in (keeping the tray on the middle rack of the oven) for oh, about 5 minutes or so, until the tops were nicely golden brown. If necessary, you can flip the chicken back over, and grill the other side too for 3-4 minutes to get the required deep, rich color and crunch. Just be sure to keep an eye on them the whole time. With the broiler, they go from nicely brown to charred in a blink of an eye.]
Ta-da…
… oven-fried chicken. Not a bad looker - for a first attempt, no? Okay, it got a little charred in some places – my 18 year old oven is notoriously temperamental and uneven at the best of times.
But it was scrummy.
Okay, assembly time. Split burger buns into half (I like to use the kitchen scissors for this; it makes for perfectly halved buns that are not inadvertently flattened or misshapened by heavy fingers, and that stay nicely soft and fluffy). If desired, pop the cut bun halves into the toaster oven (cut side up) for a couple of minutes to give a light touch of crispiness, and to help prevent the buns from going soggy too quickly from the gravy. Not necessary at all, but nice if you have the inclination.
Place a layer of cucumber slices on the bottom half, top with the chicken filet, add some onions (if using) then finish off with a liberal dollop of satay gravy. Cap with the top half of the bun. Dinner is served.
The burger was seriously good. In the words of A, our house-help: way better than KFC’s version (which she had tried) – our gravy was not as sweet and the fresh-out-of-the-oven chicken was crispier, tastier, more juicy, moist and succulent than the commercial offering. She really liked the buttermilk-marinated, oven-fried chicken. So did I. As did everyone else.
I really like this way of cooking chicken. The buttermilk gives the meat incredible moistness and tenderness. I can just see me making all sorts of chicken this way – the flavorings can be varied endlessly (using hoisin sauce, teriyaki sauce, herbs and spices – whatever I may fancy – with the buttermilk). And it doesn’t even have to be oven-fried chicken each time. I think this would be a great way to marinade chicken for grilling or roasting. Great stuff.
Oh, I can also see doing this chicken burger in different styles too. One in a Californian-style would be delectable… with some sprouts and an avocado-tomato salsa topping the chicken filet instead of the satay sauce. Or, borrowing an idea from Burger King, pour some spicy rendang sauce over the meat. Yum!
And after that rather simple but healthy and very tasty dinner, time for a luscious reward – a Ben & Jerry’s sundae. Cookie dough ice cream, here I come! Oh yeah!
Copyright © 2004 Renee Kho. All Rights Reserved.
Please contact me for permission to copy, publish, distribute or display any of the images or text contained in this article.
03:20 PM in Home Cook: Poultry & Meats, Home Cook: Sandwiched! | Permalink | Comments (15) | TrackBack
Friday, August 27, 2025
Stttrrrreeeeettcchhhhiiiinnnngggg It Out
I recently had my first mooncake of the year… Yes, it is that time of the year again; mooncake time of the year.
But have you noticed? “Mooncake time” has stretched progressively over the years, and now lasts for a lot longer than is traditional. It used to be that mooncakes were only sold after the Hungry Ghosts Festival (which runs for the whole of the seventh lunar month; a time when it is said that the Gates of Hell are flung open, and the souls of the dead are released and allowed to wander the planet freely and to mingle with the living) had ended. It was deemed inauspicious to sell mooncakes during the ghoulish seventh month – after all, the Mid-Autumn Festival is considered one of the most auspicious of the major Chinese festivals; and the twain must not meet.
This meant that, with the Mid-Autumn Festival (or more casually known as the “mooncake festival”) falling on the 15th day of the 8th lunar month (the day when the moon is said to be at its roundest and brightest for the whole year), you essentially got to eat mooncakes for about 15 days each year – from the 1st to the 15th of the eighth month.
However, the powers that be in the hard-hitting world of commerce decided that they weren’t making enough profits (despite the daylight-robbery-esque prices of mooncakes during the festival); they started to sell mooncakes in the last week of the Hungry Ghosts Festival, figuring that modern society was less superstitious and people wouldn’t mind buying and eating mooncakes during the tail-end of the 7th month. And they were right; consumers lapped up the opportunity to indulge in these sweet treats for an extra week.
With dollar signs flashing in their eyes, retailers soon pushed the yearly launch of mooncakes to the middle of the seventh month (hey, what’s another week between money-takers and money-givers, right?); mooncake eating now stretched over one full month.
Then, a couple of years back, I started noticing that some bakeries and restaurants (thank goodness hotels on the whole have stuck to the less-insane mid-seventh month launch date) were rolling out the mooncakes at about the same time the first joss-sticks were lighted at the start of the Hungry Ghosts Festival! This made for six weeks of mooncakes! That was pushing it a little I thought.
But this year seems to take the cake… um, the mooncake that is. Mooncakes were already on sale in the middle of the 6th lunar month! Two full months before the festival proper! The festival this year falls on 28 September; the very first mooncakes started to trickle onto the market at the end of July. To me, this seems overdone; it's robbing the festival of all meaning and significance. I mean, there are only so many mooncakes you can eat before you get well and truly sick of them – they are after all very, very sweet and rich confections. By the time you get around to the festival itself, you are not going to be wanting anymore mooncakes.
Another sad case of commercial greed sending a bona fide festival that once held much significance and joy, to its early dollar bills-lined grave?
I used to love mooncakes. Next to Chinese New Year, the Mid-Autumn Festival was probably my favorite Chinese festival. Years ago, I would look forward with much anticipation to the annual festival. Those two weeks in the run-up to the festival were so precious; a time to cherish and enjoy every opportunity to indulge in these yummy sweet delights. Now, mooncakes don’t really move me very much anymore. I still like them, but those heady, heart-a-flutter, joyous feelings (quite like the first flush of love) are gone. It is hard to get excited about something two months ahead of schedule; it’s what I call eating out of context!
I’ve not had any urge to buy the mooncakes that have been launched so far this year. The only reason I’ve gotten to eat some recently is because a dear friend brought me a box of them as a gift – a box of mooncakes hand-carried all the way from Hong Kong no less.
I have to admit: I still enjoy the “ceremony” of opening up a fresh box of mooncakes; I have a sort of personal “breaking into a new box of mooncakes” ritual, leftover from the days when mooncakes were a much scarcer commodity.
These ones from my friend came in a lavishly illustrated metal box (see top picture), as opposed to the traditional paper box. I spent a few moments taking in the lovely countenance of “Lady Moon” with her rabbit. I gazed at the depiction of the Hong Kong skyline, and reminded myself it has been more than a year since I was last in the territory, and perhaps it was time to make another visit soon for lots of good food and shopping. Before my mind wandered too far away, I jolted back into the present, and enthusiastically pulled open the lid of the box…
And a glorious sight it was that greeted me… four round, glossily glazed, lusciously golden brown discs stared out at me. This first glimpse into a box of mooncakes is the first in a series of my “favorite” opening-of-a-new-box-of-mooncakes moments. There’s nothing quite like four suave, highly tanned mooncakes gazing at me to get my taste buds into a right tizzy.
One of the mooncakes was lovingly removed from its plastic cradle within the box. A sharp knife was run quickly and painlessly down its center… and immediately, it revealed its glorious secret…
Two rich, shiny golden orbs blinked dazzlingly in the sunlight that was streaming through my kitchen window. Oooh… this was a box of white lotus seed paste (lian yong) mooncakes with double (salted duck’s egg) yolks.
I’d have to admit that I’ve never been a great fan of Hong Kong’s Maxim’s mooncakes (sorry, BL ![]() ), but these were nice versions.
), but these were nice versions.
The yolks were incredibly fresh: rich, vibrant, bright hues of sunset with a luscious, glowing sheen.
The white lotus seed paste was of an appetizingly natural color, as opposed to some of the rather exaggerated shades of “pale” that we sometimes see here – which in all probability are the results of adding some kind of starch (possibly potato starch) to the lotus seed paste mixture, both to add bulk and to lighten the color.
The lotus paste in these HK mooncakes were of a delightfully silken smoothness and softness – a result of a lot of oil being used to cook and mix the paste. It made for delicious, but incredibly sinful eating. Everything was very fresh: the pastry, the lotus paste and the yolks.
Since we are talking about mooncakes, let’s talk about the types that I like…
I’m not a snow-skin ("bing pi" or literal translation: ice skin) mooncake person at all; mooncakes with the baked pastry crust are the only ones I will eat. I find the snow-skin too sweet; and after discovering, many years back, just how much shortening (or lard traditionally) and sugar goes into making the snow-skin pastry, I’ve never been able to bring myself to it eat again. It has a lot more fat and sugar than the baked pastry skin (which in itself already has a fair bit of oil). It is rather deceptive I know; the snow skin feels less rich and oily, but there is a whole lot more fat and sugar in it by necessity, to get the pastry to that requisite soft, silky, pliable and palatable texture. (For me, it has been another classic case of being turned off a food after discovering the “secrets” behind the recipes and realizing how terribly unhealthy the food is; taste for taste, I just can’t justify the caloric consumption of a snow skin mooncake over the baked pastry mooncake. I have to do right by my tummy after all! ![]() )
)
…and by my eyes and taste-buds too. I love the look and taste of the baked crust. I really do. As with almost all things baked in an oven, it is aromatic in that special way that only things baked in an oven can be. That special golden, tanned yumminess that is quite irreplaceable.
The crust is easily my favorite part of the mooncake. Yet, I don’t like it when it is all just pastry either… family and friends always suggest to me that I should simply buy and eat “piglets in a basket” instead, since these are just mooncake pastry dough shaped into little piglets, baked and sold in tiny little plastic baskets. It has no fillings; just pastry dough. The tradition of selling these “piglets in a basket” evolved from bakers wanting to find a way to use up leftover mooncake dough; they thus shaped the scrap pieces of pastry into cute piglets and sold them as a cheap, cookie-like Festival snack for children. But even as a child, I never took to the little piglets. No, much as I like the pastry, I don’t like an entire dense chunk of it; mine must come as a thin layer over some scrumptious filling…
I’m quite fussy about the number of yolks in the mooncakes too. I don’t really like having more than one salted egg yolk in my mooncakes; I think it upsets the intricate balance between pastry, lotus paste and yolk too much.
Ideally, each wedge of mooncake should have a thin layer of crust, a nice amount of smooth, silken, sweet lotus paste, and just a touch of yolk to add a nuance of saltiness. Too much yolk and it just gets too stomach-sinkingly rich; a feeling that sometimes even cups and cups of Chinese tea cannot remedy. Not pleasant. Two yolks in a mooncake are still tolerable; but really, when you hit four yolks in one mooncake (usually the preferred variety for business gifts as it symbolizes an abundance of golden riches), it’s hardly palatable - in my opinion at least. There’s hardly any room for the lotus paste; it’s almost like eating salted yolks wrapped in pastry!
My all-time favorite mooncake is my mum’s home-made wu ren (mixed nut with Jin Hua ham) mooncake. This is the only wu ren mooncake that I (and the whole family for that matter) truly love; I don’t particularly fancy many of the store-bought ones, which are usually bulked up with a lot of starch – nuts are expensive ingredients – and which almost always leave out the Chinese almonds ("nam yan" in Cantonese), because they are expensive, but which have a unique texture and add incredible fragrance and aroma to the mooncakes. This is the one mooncake my dad always requests from my mum each year. Sadly, I don’t think we are supposed to make mooncakes this year – I think someone mentioned the other day that, in light of the family’s recent bereavement, it is customary to abstain from making celebratory food. We can buy and eat mooncakes, but not make them. Go figure. Maybe I heard wrong. Hopefully I heard wrong.
So, my most preferred mooncakes in descending order of love:
• Mum’s home-made wu ren mooncake
• A tie between: dou sha (red bean paste) mooncake with melon seeds; AND bai lian yong (white lotus seed paste) mooncake with a single yolk
• Custard mooncake *
• Regular (brown) lian yong (lotus seed paste) mooncake with a single yolk
• Teochew-style deep fried crispy yam paste mooncake **
* I tasted this variety for the very first time in Hong Kong more than 10 years ago; the mooncakes were from the Zen restaurant in Pacific Place. It was love at first bite: rich, thick, smooth, eggy custard wrapped in fragrant golden brown pastry. After that, every year I would find some means of getting a box of the stuff brought to me from Hong Kong. Then, some years back, East Ocean restaurant in Singapore started producing them – and they do a credible version. So now it is a mere short car ride to get my yearly fix.
** I used to like this a lot. But suddenly, one day, I just fell out of love. I still think these crispy deep fried mooncakes taste very good whilst you are eating them; but the after-feeling is not so pleasant – that feeling of over-greased richness, that lump of heaviness that sits at the bottom of your stomach. And these mooncakes don’t keep well at all; they are best eaten on the day they are made. They’re still okay the next day, but it’s pretty much downhill all the way after that. Having said that, I still like to savor a small piece of this very fragrant and highly more-ish concoction once in a while – oh, maybe every other year or so; but that is about as far as the love affair goes, at my age.
Thus far, I have not been able to get involved with any of the spandangled, new-age flavors that have been rolled out over the last few years – things like durian-, mango-, coffee- or green tea-flavored mooncakes. There are even things like birds’ nest mooncakes and XO (Cognac) mooncakes! The only reaction I have been able to muster is: huh? I think there is something to be said for having boundaries in creativity, and that includes creativity in food; I’m not sure about the merits of innovation for innovation’s sake alone. It’s amazing the things people will do to entice consumers to part with a few more dollars. Some traditional flavors are worth honoring, I feel.
The one “newer” flavor that I find acceptable is pumpkin. But that is not even really “new”. It is a natural extension of the Teochew yam mooncake (which in itself is a derivative of the famous Teochew dessert or nee that oftentimes is served with both yam and pumpkin pastes).
I’m not taken with ice cream mooncakes either. Sorry, but I really can’t see what the fuss is about; if I want ice cream (which I can eat year round on-demand), I would order a sundae; I don’t need to have it in the shape of a mooncake.
However, not all innovations are bad. Last year, a friend gave me a box of jelly (agar-agar) mooncakes, and those I really enjoyed.
So, yes, I’m probably a mixed up gal when it comes to mooncakes; but ultimately I’m also a traditionalist at heart.
And now that I’ve shot my mouth off about my mooncake preferences, what’s your mooncake fix of choice?
It’s still another month to the Mid-Autumn Festival, but most surely, the madness has already long started; the moon is not yet round, but mooncakes are already all around.
Copyright © 2004 Renee Kho. All Rights Reserved.
Please contact me for permission to copy, publish, distribute or display any of the images or text contained in this article.
02:30 PM in Festivals: Mid-Autumn 2004 | Permalink | Comments (22) | TrackBack
Wednesday, August 25, 2025
Chinese Italian or Italian Chinese?
Whichever way it is, this dish is a very quick, easy, and most importantly, tasty dinner option. Two pots, seven ingredients (excluding seasonings), 30-35 minutes and you are ready to eat. And not only is it a minimum-fuss recipe to prepare, it is very healthy too – I love pasta (yes, pasta is a carb and yes, pasta is good for you; just look at Sophia Loren), and it works beautifully in this combination: the tofu offers a good source of quality protein and the walnuts bring with them their high concentration of omega-3 acids, while the classic Nonya rempah (ground spice mix) chilli garam (a combination of chilli, candlenuts and shallots) adds a fiery zing, and the fresh coriander, with its aromatic perfume, rounds off the flavor matrix with a refreshing nuance. This dish may be vegetarian, but I think it is one that even die-hard meat lovers won’t turn their noses up at.
Usually, when we think quick, easy and simple dishes, we think they are somehow not presentable enough to serve to guests; but this dish is eminently party-worthy. It is very pretty – the red chillis coat the pasta with the gorgeous colors of sunset, spiked with the warm golden brown of the walnuts and the lively green of the coriander. I have served this to friends and it’s been nothing but good responses from everyone. And the great thing is, it’s so easy and quick to prepare; you don’t have to be fiddling in the kitchen after your guests have arrived.
This dish is a (perhaps fairly eclectic) blend of Asian and Italian influences. Yes, it belongs to that now very maligned category of foods called “fusion”; but it works, and works very well.
Of course, you can choose to make it more Asian by using Chinese noodles like dried la mian, spinach noodles or egg noodles. Or, you can choose to play up the Italian-ness in the dish and use Italian flat leaf parsley in place of the coriander, and maybe use toasted pine nuts instead of walnuts. Really, this dish is highly versatile and very amenable to playful adaptation.
For those who truly can’t bear the thought of eating a meal without animal protein, diced chicken meat can be substituted for the tofu. And you can even use cashew nuts with the chicken instead of walnuts. Alternatively, try prawns with cashews.
I however really like this vegetarian version; I’ve made this pasta several times already, and it’s quickly become one of my favorite ways to prepare pasta.
Sambal Tofu Walnut Pasta
Serves approximately 4 persons
200-250g dried pasta (spaghetti, fettuccini or linguini) OR dried Chinese noodles (la mian, egg noodles)
1 teaspoon salt
2 large squares firm tofu (tau kwa), crumbled
100g walnuts, toasted and roughly chopped
4 stalks fresh coriander leaves (cilantro; Chinese parsley), chopped
1 lemon, cut into wedges
light soy sauce, to taste
sugar, to taste
For the Sambal:
12 shallots
12 dried red chillies
4 candlenuts (buah keras)
3 tablespoons olive oil
2-3 tablespoons light soy sauce, OR 1 teaspoon salt
1 teaspoon sugar
• Peel the shallots. Scald the dried chillies with boiling water and pat dry. Remove seeds. [I tend to remove all the seeds, and find that the dish has just the right amount of heat – enough to get me sniffling and stretching for a Kleenex. However, if more spiciness is desired, just leave some of the chillies with seeds in, or leave all the chillies with seeds in.]
• Using a mortar and pestle, pound the shallots, dried chillies and candlenuts to a paste-like consistency. [You won’t be able to get it to a completely smooth paste because of the dried chillies, but that’s good – the skins of the chillies offer interesting specks of texture, color and flavor in the final dish.] Set aside.
• Bring water to a boil in a large pot; add 1 teaspoon of salt and the pasta. Cook until al dente.
• In the meantime, heat a large frying pan. Add the oil and sauté the ground sambal ingredients until aromatic (about 5-8 minutes or when you feel your nostrils tingle a little and sense a sneeze coming on). Season with 3 tablespoons of light soy sauce (or 1 teaspoon of salt; though I tend to prefer the light soy sauce as it adds a depth and richness of color to the sambal and gives a more complex flavor too, but that’s just my personal preference) and 1 teaspoon of sugar.
• Toss in the crumbled tofu and fry for about two minutes. Add the chopped walnuts; mix well. Adjust the seasonings if necessary. [At this point I usually add another 2-3 tablespoons or so of light soy sauce and maybe ¼ to ½ teaspoon more of sugar if necessary. It sounds like a lot soy sauce but it really isn’t; and I’m one who can’t stand over-salted food. Of course, the amount needed also depends greatly on the brand of light soy sauce you use; some brands are much saltier.]
• When the pasta is cooked, set aside 3-4 tablespoons of the cooking water, drain the pasta and add to the sambal pan, together with the reserved pasta cooking water. [Do not rinse the cooked pasta; but if using Chinese dried noodles, you can give the cooked noodles a quick rinse under running water, then pour some boiling water over the noodles to warm them up again, before tossing them in with the sambal.]
• Add the chopped coriander leaves, and toss well.
• Serve hot, with lemon wedges.
I think the lemon is an important component; it somehow seems to bring all the flavors together into a cohesive whole, plus of course, it gives the dish a delightfully appetizing tangy overtone.
For me, one of the nicest things going for this pasta dish is the complex layering of both texture and flavor: the soft, creaminess of the tofu is contrasted with and complemented by the aromatic crunch of the walnuts and the tender toothsome-y bite of the pasta (in this instance I had actually used semi-wholewheat pasta); the tingling spiciness of the chilli rempah sets off the blank canvas of the tofu and pasta beautifully, while being highlighted by the perfumy herbiness of the coriander and the cheery zestiness of the lemon. The whole dish just comes together rather well: wonderfully rich in flavors and textures, whilst staying fairly light on the palate.
Okay, one final bossy suggestion from me: if you would like to tone down the chilli heat level of the dish, simply make some adjustments to the sambal: use less dried chilli (oh, maybe 9 or 10), more shallots (around 14-15) and more candlenuts (around 6 should be fine). The key really is just to maintain the volume of the rempah; the sauce is a very “dry” one, so the volume is necessary.
Alright, I lie. Here’s one more bossy suggestion; this really is the last one. I promise. Here’s a nod to the carb-avoiders: you can still create a great dish by junking the pasta altogether, and just sautéing the tofu and walnuts in the chilli sambal. This can then be served wrapped in crunchy lettuce leaves. Scrummy is the word.
Copyright © 2004 Renee Kho. All Rights Reserved.
Please contact me for permission to copy, publish, distribute or display any of the images or text contained in this article.
01:22 PM in Home Cook: Rice, Noodles etc, Home Cook: Soy | Permalink | Comments (15) | TrackBack
Tuesday, August 24, 2025
A Moment
In a world of sometimes over-commercialization and endless business meetings, it’s nice to sit back and take a moment to simply marvel at the inherent beauty of…
… a home-cooked meal.
If you’ve been following this blog closely, you will probably have realized that the angled luffa gourd, or ketola as we call it in this part of the world, is among my favorite vegetables to cook and eat. After all, I’ve already written about it a couple of times.
And guess what? Yep. I’m about to write about it again.
I was actually going to post about another recipe today, but… I’m feeling really tired; so that will have to wait until tomorrow. In the meantime, here are pictures of the ketola we had for dinner a while back. This time, cooked with prawns. And let me say : ketola with prawns is even tastier than ketola with eggs or chicken (both of which I like a lot).
The method of cooking this is pretty much the same as for cooking ketola with chicken – with a simple substitution of prawns for the chicken.
Okay, moment over.
Visa…
Oops, sorry…
I meant… Shiokadelicious!... the only word for this dish…
![]()
![]()
Okay, silly mood over.
Copyright © 2004 Renee Kho. All Rights Reserved.
Please contact me for permission to copy, publish, distribute or display any of the images or text contained in this article.
10:31 PM in Home Cook: Vegetables | Permalink | Comments (5) | TrackBack
Monday, August 23, 2025
Sugar Water
That’s the literal translation of “tong shui” (Cantonese) or “tang shui” (Mandarin) – the Chinese term for sweet dessert soups. These sweet offerings, usually served piping hot, are very much an integral part of Chinese epicurean culture, especially for the Cantonese, for whom these are almost a requisite to end the meal with, or to have as a light supper before going to bed.
All sorts of things can be used in “sweet soups” – beans (red, green or many other varieties), barley, rolled wheat flakes, lotus seeds, gingko nuts, lotus root, sago, snow fungus, red dates, dried longan… and the list goes on and on.
Even ingredients that are not normally associated with dessert can be and are often used…
Like dried bean curd (fu juk), eggs, and quail eggs! Yes, really. Quail eggs. Hard boiled quail eggs at that. It really isn’t that weird to have eggs and/or hard boiled eggs in a sweet dessert. Honest. It tastes very normal actually – for us at least. It sounds weird, but it doesn’t taste weird. You’ll have to take my word for it.
This fu juk tang shui (dried bean curd skin sweet soup) is one of the favorites of my family. And for me, sometimes, when I just want something sweet for lunch, this is what I cook up. It is real quick and easy, and infinitely healthier and more nutritious than indulging in a large slab of cake or some other dessert. I get to satisfy my sweet craving, have a good amount of protein and be completely guilt free. Not bad for a humble dessert soup, eh?
The process is very straightforward and the ingredients simple; this doesn’t even really qualify as a recipe. But here goes…
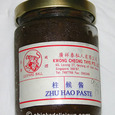
All that is needed is some dried bean curd skin (I recently found, much to my delight, this Hong Kong-made brand – see above picture – at the market provision shop; and this sheet type of fu juk is especially well-suited for making tang shui with, compared to the regular dried bean curd stick – marvelously silky smooth and very delicate and tender), dried (or fresh, if you have some on hand) lotus seeds, fresh gingko nuts, pearl barley, fresh chicken eggs, and fresh quail eggs.
The only fiddly bits are the prepping of the gingko nuts and the quail eggs. The latter have to be hard boiled and then shelled. Not difficult; just a little time-consuming – if you are using large numbers of the eggs. Sometimes I just leave them out if I’m feeling lazy (see top picture). But I do so love quail eggs, and where possible always try to include a few in the soup.
You can buy vacuum packed ready-prepared gingko nuts at the supermarket, and these are super convenient. But I have almost always, the few times I’ve tried them, had unpleasant experiences with these – most of the time, they leave a rather nasty after-taste in the mouth, presumably from the preservatives or some other chemicals that are probably used in the processing of the gingkos. So, I prefer to use the fresh ones that come still in their shells. It is a lot more work to get these prepped, but I think taste-wise, it is worth the effort. The nuts can be prepared the day before, or even several days before, and kept in the fridge. So that cuts down a lot of the “on the day” fiddling.
The shells are very hard and tough; use a stone mortar and pestle to crack them open. Once the shells have been removed, the gingkos need to go into a pot of boiling water, to soften the skin, which can then be peeled off. Then, the laborious part of the process starts: each gingko has to be carefully slit open and the bitter inner stem removed. This is extremely bitter – you absolutely do not want to be biting into a gingko nut that still has some stem in it. So make sure each stem is cleanly removed. At this point, the gingko nuts can be stored in the fridge until they are ready to be used.
To make the bean curd dessert soup: bring a pot of water to a boil (use as much water as you need to create the amount of soup you want), and pop in the dried lotus seeds and pearl barley. These need a fairly lengthy cooking time. Leave them to simmer until the lotus seeds are nicely fork tender. Just as they become ready, return the soup to a rolling boil, add white rock sugar to taste, and simmer to dissolve the sugar.
While the lotus seeds and barley are cooking, in a separate pot, boil the prepped gingko nuts in a little simple syrup water (some white rock sugar with water) until tender. Drain and set aside. (I find that boiling the gingko nuts separately and then adding them to the main soup helps get rid of any last vestiges of bitterness that may be there.)
Once the lotus seeds are ready, add the drained gingkos to the lotus seed soup and bring it back to a rolling boil. Place the fu juk sheets into the soup. Watch the pot carefully at this point; these cook real quick (in a matter of a few minutes). Avoid over-cooking the fu juk, as they will disintegrate into mush. When the bean curd skin has turned from yellow to white in color, bring the soup back up to a strong rolling boil, pour in the raw chicken eggs, give a quick but gentle stir, and immediately turn off the flame. You really don’t want to overcook both the eggs (they should be soft and silken – not coarse, rubbery – strands in the soup) and the fu juk (which should be melt-in-the-mouth tender and silky smooth, yet not mushy). Continue to stir gently as the eggs finish cooking in the residual heat, to create lovely, elegant, elongated egg strands. Finally, drop in the hard boiled quail eggs (if using). Stir to mix. Dish into bowls, and serve.
Leftover soup can be kept in the fridge for a day or so. I actually enjoy eating this soup cold, straight from the fridge, more than I do hot - unconventional as this may be. And something that will, in all likelihood, have people of my grandmother’s generation nagging at me ad infinitum if they ever see it.
Chinese women believe that eating lots of bean curd will give a porcelain-smooth complexion. ![]() I suppose there is some truth in that; given that soy is supposedly redolent with phyto-estrogens. By the same token, it is believed that regularly eating this dessert soup during pregnancy will produce babies with smooth silken skin!
I suppose there is some truth in that; given that soy is supposedly redolent with phyto-estrogens. By the same token, it is believed that regularly eating this dessert soup during pregnancy will produce babies with smooth silken skin!
Beauty aside though, this sweet soup is wonderful soul food: warming and soothing; a very comforting and restorative bowl of sweetness. The past week alone, when I’ve been under tremendous work pressures, I’ve craved, made and eaten this soup three times! It’s a wonderfully reassuring thing to tuck into – light, refreshing and calming. Besides, aren’t gingko nuts supposed to be highly beneficial for the brain? A tasty way to bolster mental energy as I burnt the midnight oil this past week.
Ah! Sweet, sweet comfort food of home!
Copyright © 2004 Renee Kho. All Rights Reserved.
Please contact me for permission to copy, publish, distribute or display any of the images or text contained in this article.
01:22 PM in Comfort Food, Home Cook: Sweet Soups | Permalink | Comments (15) | TrackBack
Sunday, August 22, 2025
IMBB7: You're Just the Cutest Little Dumpling!
Can you believe it? We’re already on to our 7th edition of IMBB – the distributed “cook-blog-athon” that was inspired and initiated by Alberto, and which, in its latest incarnation, is hosted by Jarrett.
I so very much wanted to take part in this particular edition. For those of you who have been faithfully (ahem! ![]() ) and closely following this blog, it would have been obvious that I love dumplings – all kinds of dumplings really, but with an especially soft spot for all the different Chinese varieties. When I found out (just a few days ago) that the topic of today’s IMBB was dumplings, I gave a little whoop of delight. Now, that is something I don’t mind cooking. Unfortunately, having just gotten home last weekend after 3½ weeks away, I’ve had little time this past week to cook in any meaningful manner – what with the huge backlog of work and mail to plough through, and also just trying to get my life back to being “ordinary” again after the emotionally challenging events of the past month. So, despite all well-meaning intentions, no dumplings got made in my kitchen this week.
) and closely following this blog, it would have been obvious that I love dumplings – all kinds of dumplings really, but with an especially soft spot for all the different Chinese varieties. When I found out (just a few days ago) that the topic of today’s IMBB was dumplings, I gave a little whoop of delight. Now, that is something I don’t mind cooking. Unfortunately, having just gotten home last weekend after 3½ weeks away, I’ve had little time this past week to cook in any meaningful manner – what with the huge backlog of work and mail to plough through, and also just trying to get my life back to being “ordinary” again after the emotionally challenging events of the past month. So, despite all well-meaning intentions, no dumplings got made in my kitchen this week.
However, in the spirit of fun and sharing that is IMBB, I would still like to share an old post… a Chinese dumpling that is a dumpling and yet not a dumpling in the more popular sense of Chinese dumplings. This is the glutinous rice dumpling that is traditionally eaten in celebration of Duan Wu Jie (Dumpling Festival or Dragon Boat Festival); rather distinct from other well-known Chinese dumplings like shui jiao (boiled dumplings in soup), xiao long bao (steamed dumplings filled with meat and soup) and guotie (panfried dumplings).
While they may not win many points in the “cuteness” pageant – being, as they are, more earthy, strong, solid and stoic in stature – I really enjoy glutinous rice dumplings or zhong zhi, and I especially love our family’s own “unique” version that my mum and I make but once a year, during the Dumpling Festival. Here is the write-up for this year’s marathon dumpling making session, which took place back in June...
And if you would like to see a couple of other varieties of these glutinous rice dumplings (albeit not home-made)…
Copyright © 2004 Renee Kho. All Rights Reserved.
Please contact me for permission to copy, publish, distribute or display any of the images or text contained in this article.
10:31 PM in Food and Drink | Permalink | Comments (3) | TrackBack
Friday, August 20, 2025
Cheesy Foursome
It’s more cake again today, I’m afraid. Are your teeth aching already from all the sweetness of the previous two days? Well, just bear with me; no more cake posts after this – for the next few days at least – I promise.
My friend showed up at my door the other day, bearing a box of mini cheesecakes; and since I was not one to turn down any sort of dessert without a perfectly good reason (such as maybe being ill and completely bed-ridden), I accepted the sweet gift with much joy; never mind my beginning-of-the-week-decision to eat healthy and cut out all desserts for the next two weeks.
These mini cheesecakes were from the Marriott Hotel. I had never tasted Marriott’s cheesecakes. For some reason, it simply never occurred to me that they might do very good cheesecakes. Apart from the Ritz Carlton, I tend to buy my cheesecakes from non-hotel sources. I don’t even particularly like the Hilton cheesecakes very much, even though half the country raves about them being the best in town. I find them too rich and dense for my tastes. I can barely manage half a slice, and even that small amount usually leaves me with a decidedly uncomfortable, heavy-as-a-rock, indigestible lump of rich cheesiness sitting in the pit of my stomach for the rest of the day. And that’s not a feeling I enjoy.
But these ones looked prettily dainty and elegant…
(And yeah, he had already popped one into his mouth before I could even reach for my camera; thus the gaping space in the box!)
There were four varieties for me to savor: raspberry, Oreo (my usual favorite flavor for cheesecakes), strawberry/blueberry and New York-style.
“These are raspberry cheesecakes”, I said in a tone that hinted, “you should know I don’t like raspberries in any form”.
“They’re for me and the rest of the family who might want to taste the cheesecakes”, he said in a tone that implied, “you mean you are going to eat everything all by yourself?!”
“Oh… ok… would anyone like some cheesecake?” I asked.
And yes, the rest of the family did want some cheesecake too.
“These cheesecakes are so small and cute”, I said in a tone that suggested, “how come there are only 8 mini cheesecakes meant for so many people”. (My “many” being four people in total.) But these were truly very small cheesecakes; almost bite-sized. Well, okay, not quite bite-sized; I exaggerate. But definitely 2-mouthfuls-sized cheesecakes; or for someone with a daintier bite, like yours truly, 4-mouthfuls worth of sweet delight to every mini-cheesecake.
“I thought you said you are on a diet?” came the rejoinder.
I gave one of my “looks” – you know, the “well, why did you buy the cheesecakes then?” look – and proceeded to cut each small cheesecake into half, so everyone could taste a tiny piece of each flavor (minus the raspberry version for me, of course).
I’m usually a sucker for Oreo cheesecakes. It does not matter how wide an array there is in front of me or how delicious other cheesecakes may look, if Oreo cheesecake is among the choices available, almost always (not always, but very nearly) I would plump for the Oreo.
It used to be that I absolutely adored the Baker’s Inn’s version. That was about 4-5 years ago. Nowadays, I have yet to find one that I particular love. Could this be a candidate to fill the Oreo cheesecake void in my life? Could this be the start of a brand new, long-lasting relationship, I wondered?
This Marriot-made version wasn’t too bad at all. The Oreo crust and crumbled topping were slightly too moist, but at least they weren’t cloyingly sweet. The cheese filling was very nicely soft, smooth and fluffy with just the right amount of denseness – plus, with none of that temple-aching sweetness. The rich cheese flavor was nicely counterbalanced by the fairly light, fluffy texture. The only thing missing were the chunks of Oreos in the filling; but I guess with such a small sized cake, that probably wasn’t practical.
Over all, not too bad at all. I would have happily eaten one whole mini cheesecake by myself; maybe make that two whole mini cheesecakes by myself. But that was before I tasted this…
Ah! This was a stunner. It took my breath away; and I wasn’t expecting it to, which made it even more breathtaking I suppose (if you can follow the logic of that). The colors were very pretty: the cheery, bright summery redness of the strawberry slice, with the quiet cool suaveness of the blueberry, juxtaposed against the pure, smooth creaminess of the cheese. A perfect splash of color against an elegant pale yellow canvas.
Yet, I was expecting something fairly ordinary tasting; it looked like it was simply a regular baked cheesecake topped with a couple of fresh fruits for aesthetic effect. But oh, I was so wrong. One bite and a “mmmmm… wow!” escaped, unbidden, from my lips. This was good!
It wasn’t just any regular baked cheesecake; this was a lemony baked cheesecake. And it was good! (Oh, have I said that already?) The lemon notes were fairly subtle, yet distinct, and oh so elegant. Very nicely balanced; nothing jarring, nothing obvious – just a delicate zesty tang that was absolutely delightful!
The texture of the cheese filling was also lighter, smoother, fluffier than the Oreo one. It was melt-in-the-mouth tender, with just the right amount of denseness and richness. Very nice indeed! Now this, I could have a whole big piece of!
This looked like an approximate of a New York-style cheesecake, with an added swirl of chocolate decoration on the top. Meeting my palate straight after the lemon-berry cheesecake, it had a hard act to follow; and it didn’t quite manage to rise to the occasion.
It wasn’t a bad cheesecake. Not at all. In fact, it was a fairly good version, as far as New York-style cheesecakes go – or more accurately, New York-style cheesecakes according to my taste preferences. The texture was somewhat heavier than the rest of the cheesecakes in the box, but decidedly lighter than most other versions of New York cheesecakes. There was a nice fluffiness to the dense filling which made it highly more-ish.
Still, I was more infatuated with the lemon cheesecake. That was something I would buy for myself from the Marriott. Of course, I would hardly complain if people decided to show up at my doorstep with more of the stuff! ![]()
![]() The other two cheesecakes (that I tasted) were good too; they were definitely worth a taste-run.
The other two cheesecakes (that I tasted) were good too; they were definitely worth a taste-run.
There’s also something to be said for buying mini versions, rather than regular cheesecakes. They’re great! They allow you to split the guilt and spread it throughout the day. (Portioned-out, bite-sized packets of guilt, what would Freud have said to that?) You don’t have to eat an entire slice of cheesecake in one go – which is usually a rich and heavy experience by most standards. Besides, it’s a lot more fun (I think) to walk by the fridge and sneak out a small cheesecake every few hours or so. It makes the entire day so much more pleasurable, don’t you think? A day filled with small, elegant mouthfuls of luscious, sweet treats. How nice!
And how remiss of me to have completely overlooked the Marriott as a source of good cheesecakes. Well, no more. It has been added to my little “food black book”.
Copyright © 2004 Renee Kho. All Rights Reserved.
Please contact me for permission to copy, publish, distribute or display any of the images or text contained in this article.
06:26 PM in Lion City Shiok-Eats: Cakes & Desserts | Permalink | Comments (15) | TrackBack
Thursday, August 19, 2025
Feeding a Crowd – Almost
After the previous day’s minor pound-cake-shortage fiasco, I was back in the kitchen measuring, mixing and stirring up a storm of pound cakes.
I wanted to do a different flavor from the day before; vanilla, whilst supremely tasty, was, well, a little “safe”. Ideas were bursting from my brain: lemon, lime, chocolate chunks, grated dark chocolate (for a speckled effect), walnuts, coconut, mango, pineapple even… But, a quick straw poll – or at least, the kids decided to take a spur-of-the-moment referendum amongst themselves – showed that orange was the flavor of choice (garnering 98% of the votes, or so I was told - hmmm… did I detect some vote-rigging going on there?). And so orange pound cake it was.
I used the exact same recipe as the day before, with just a few minor adjustments:
• The vanilla extract was left out this time around, and replaced with the finely grated zest of two medium oranges (about 3 teaspoons). [I added the grated zest to the sifted flour mixture and mixed it in well, so that it would be evenly dispersed through the cake batter.]
• About two tablespoons of buttermilk were removed from the half cup measure, and replaced with about 3 tablespoons of freshly squeezed orange juice. [I contemplated using more orange juice, but didn’t want to upset the dry and wet ingredients ratio too much; I also didn’t want to remove too much of the buttermilk, which was important for leavening and also absolutely key to the wonderful texture of the cake, given the already very low butter and eggs content.]
• The amount of sugar wasn’t reduced by very much. [I used a scant cupful, figuring that the acidity of the citrus would balance the sweetness out nicely this time around.]
• Instead of using the silicone bundt pan again, I opted for two 8”x4” loaf pans. [And discovered in the process that it took 1½ portions of batter to fill two loaf pans nicely. My initial single portion of batter produced two somewhat shallow cakes.]
• The cakes were baked at 170C (or what I presumed to be 170C on my Aunt’s oven) instead of 160C. The cakes were done in 40 minutes. [Actually, the color on the first batch of cakes was a little light; so we upped the temperature a teeny bit, and the subsequent batches turned out pretty good. That was probably at about 175-180C; but I’m guessing – I have no idea what number “7½” on my Aunt’s oven is in terms of temperature. It was literally a baking by trial-and-error experience! Certainly gives new meaning to the term “baking blind”!]
As expected, the cakes turned out very delicious. (Sorry, the pictures were of the very first batch, which was not as nice-looking as the subsequent batches. There was simply no chance to get a camera near the subsequent loaves that came out of the oven, as family members flooded through the kitchen door to claim their share of cake.)
The aromatic orange flavor was a hit, and I thought the visual effect of the little specks of orange zest speckled through the cake was lovely – all bright, cheery, citrusy and summery.
I adore this recipe for the texture of the cake – with its meltingly tender crumb, and soft, fluffy bite with just the right amount of denseness. Gorgeous!
We (yes, we… but more on that later) ended up making, oh, probably about 6 or 7 batches of the cake (with each batch being a 1½ portion of the recipe). But why split the batter-mixing into a laboriously long drawn out 6-7 stage affair, you ask? Well, the oven was rather small, and could only take two loaf pans at the most, at any one time, and I didn’t want the ready-mixed batter sitting out in the hot, humid kitchen for several hours, waiting its turn in the oven. Plus, the stand mixer wasn’t very big. So, as each session of cake went into the oven, we started up the next batch of batter. Phew! That was a lot of measuring and mixing for one day! And even then, strict food “rationing” was still in force – strictly one piece of cake per person, regardless of age! And I even had a whole battery of “food police” to help monitor the situation and make sure no one “cheated”!
Personally, by the second batch, I was dying to make the cake in a lemon or lime flavor (my Aunt’s lime bush, visible through the kitchen window, seemed to be calling my name); I just felt that the nice acidy tang of lemon or lime would make for a nicer, fuller and more rounded sweet-tart balance in the cake compared to the orange, which, though fragrantly citrusy, was a little sweet (my Aunt only buys very sweet eating oranges!). But sanity and pragmatism prevailed: making different batches of cake in different flavors was just asking for trouble. It was definitely not a good idea to spark another mad food scramble, like that of the previous day. Since we started with orange, so orange it would be for everyone. All’s fair in life and… food! ![]()
However, I did give some of the subsequent loaves a glaze, at the request of the children. For those who liked their pound cakes au naturel, there were the unglazed loaves. For the kids, they got a simple orange icing (sifted powdered sugar mixed with just enough freshly squeezed orange juice to get a nice glazing consistency). For the grown-ups with a sweet tooth, I added a glug of amaretto (I would have liked cointreau, but I just worked with whatever was made available to me) to the glaze; although some of the teenagers (and even some of the pre-teens) felt they were more than old enough to have “fortified” icing on their cake! It sounded a little strange, but it worked. Almonds and orange: who would have thought? For myself, I made up a nicely sweet-sour lime icing… and satisfied my craving to go out into the garden and pluck some fresh limes from that lime bush that had been smiling at and beckoning to me all afternoon!
And it was certainly an eventful afternoon. As it turned out, I became the de-facto “babysitter” of 13 kids (from toddlers to “tweens” – I believe that is the new, modern term for pre-teens ![]() ). The rest of the adults were clearly glad to have the bunch cleared from underfoot and kept gamely occupied for a few hours, so that they could get on with the zillion things that still needed to be done. The kids obviously had a whale of a time, “playing”… oops, sorry, I meant baking… with flour, eggs and cake batter. For almost all of them, it was their first time cooking and baking, and I think it was such a thrill and eye-opening, educational experience.
). The rest of the adults were clearly glad to have the bunch cleared from underfoot and kept gamely occupied for a few hours, so that they could get on with the zillion things that still needed to be done. The kids obviously had a whale of a time, “playing”… oops, sorry, I meant baking… with flour, eggs and cake batter. For almost all of them, it was their first time cooking and baking, and I think it was such a thrill and eye-opening, educational experience.
Well, I, too, learnt a thing or two that afternoon. For one, it’s just not in me to cook or bake for a large crowd on short notice – especially when all I have on hand are small family-sized kitchen equipment; and when I also have a “Board of Directors” made up of 13 highly vocal “bosses” to answer to, with questions and suggestions flying at me by the dozens; and who had energy enough for a group twice their numbers. By the end of the afternoon I had to go lie down in a darkened room, with a cool compress over my eyes and forehead, and with pure, unadulterated, blissful silence ringing in my ears. I was just thankful and relieved that the afternoon passed without incident – every child managed to keep their 10 fingers intact (none were lost to the whirling stand-mixer) and noses unburnt (despite persistently placing them way too near a burning hot glass oven door to peer at the cakes to make sure they were rising and cooking satisfactorily!). And we even managed to produce more than a dozen loaves of delicious orange pound cake along the way. How’s that for an afternoon’s work? Not bad, huh? But once is enough for me, thank you very much. Now, hand me my ear plugs, please…
Oh, and before I forget… Shirley this is for you. No, I haven’t forgotten your request, and yes, I thought of you as we baked the cakes. So, here is how I “wrap” the loaf tins with a damp towel to help the cakes rise evenly…
Wet thoroughly a small towel – any small tea or hand towel that you have on hand would be fine – and wring out the excess water. The towel should be nicely damp – not too wet nor too wrung out either.
Fold the towel lengthwise into three (or four, depending on the width of the towel and the height of the cake pan). It doesn’t have to be precise or neat… you may even choose, if the mood so strikes, to just scrunch up the towel to the height of the cake pan.
Place the cake pan on a baking sheet with a ledge. Wrap the towel around the cake pan, with the two ends of the towel starting and ending at the side, between the cake pan and the ledge of the baking sheet. The latter will help to hold the towel in place…
If necessary, use a pin to tack the two ends of the towel together. (But I have found it sufficient to just use the ledge of the baking sheet to hold the towel securely.)
A second loaf pan can also go on the same baking sheet, with another towel wrapped around it. Then, into the oven they go.
Here’s to evenly risen, level cakes!
Copyright © 2004 Renee Kho. All Rights Reserved.
Please contact me for permission to copy, publish, distribute or display any of the images or text contained in this article.
11:30 PM in Home Baker: Lighten Up! Cakes | Permalink | Comments (8) | TrackBack
Wednesday, August 18, 2025
Feeding a Crowd – Not
Have you ever noticed? Often times, when in situations of emotional strain, one of the first things to go is our eating sensibilities. Even those who are normally very conscious of what they put into their bodies are found carelessly quaffing can after can of sugar-loaded, fizzy drinks and munching on greasy, salt-laden food throughout the day.
Several weeks ago, during the initial phase of the chaotic emotional upheaval the family was dealing with, I found myself, on several days, completely “forgetting” to eat – for the entire day. By nightfall, I was feeling faint, dizzy and weak from the lack of nourishment and from dehydration. I even “forgot” to drink water. Then there were the couple of days when I swung to the other extreme; and ate nothing but candy bars and sugary cakes and buns all day. By the end of the day, I had so much sugar coursing through my veins that I was, well, not quite myself either.
I guess it was inevitable that proper meals would be nigh impossible – what with a zillion details to work out and get organized within a matter of days, and having at the same time to deal with the constant flow of visitors*, all very kindly and sincerely wanting to offer help and support. (It’s funny how no matter how many times one may have gone through similar preparations, one is still never ready or prepared to go through it again. It always feels like the first time; there is the same feeling of confusion and chaos that reigns – for everyone.) We fell back on catered food and/or take-out, to feed both ourselves and our stream of guests. So, day in and day out it was oily, fat-soaked food that had sat in the warmers all day, and all topped off with fizzy drinks, sugary cakes and pastries.
[* Perhaps a quick side note for those not familiar with Chinese-style wakes: these can be lengthy affairs, stretching anywhere between 3 to 7 days; with 3 or 5 days being the norm as most families find it too exhausting to do it for 7 days. It does take a lot of stamina, simply because it is customary – especially if the wake is held at home – to never leave the body “alone”. As such, there are always people up and about throughout the day and night – 24 hours a day. Guests and visitors, friends and relatives, parish priest and church friends visit throughout the day and night. And so, everyone sits around eating (a lot – to try to keep awake) and chatting. Sleep comes in the form of power naps of 1-2 hours, caught when and where possible in a crowded house. If you are lucky, you might manage to snatch some empty bed space and get some restful sleep – but only for a few hours, before having to awake and make way for the next person to catch some sleep – otherwise, most of the time, flitful rest during those few days are had slumped in the nearest empty armchair. By all counts, sleep and rest are hard to come by throughout the entire duration of the wake.]
Thankfully, after the initial frenzy and with the most important formalities over, things settled a little, and some of the women folk got organized in the kitchen; spirit-reviving fresh vegetables and soul-soothing soups started to appear on the table. I decided to make my own little contribution (plus to maybe find some brief refuge in the kitchen, far from the maddening crowd) by baking some healthier cakes for the family. After days of over-frosted, over-sugared, butter-clogged store-bought cakes, the kids were almost climbing the walls on a sugar high! It was time for something simpler, homelier and lighter.
One of my cousins had Alice Medrich’s recipe for a low-fat buttermilk pound cake which I had emailed to her some months back. She had tried it once, and liked it. I had never made the recipe, and decided to try it.
It was strange working in someone else’s kitchen. The equipment, the layout, and basically “how the whole system worked” were different. And so I had my little culinary adventure (or misadventure) with this recipe.
The cake was supposed to be baked at 160C. I was told that “number 6” on the (electric) oven dial was 160C. Simple enough. But as it turned out, it wasn’t quite. The recipe called for the cake to be baked for about 35 minutes (if using a bundt pan). At the end of 35 minutes, my cake was still very pale, although a light crust had formed on the top. I started to feel suspicious. Inserting a skewer into the cake brought the discovery that the insides were still liquid batter! Completely uncooked! Apparently, the oven needed to be turned up to at least “number 7” to be “activated”, and then turned back down to “6” after it had heated up. Ah! Critical missing bit of information. So, the heat was turned up to “7” and the cake baked, at that temperature, for another 15-20 minutes or so. And as a testament to the hardiness of Alice’s recipes, the cake seemed none the worse for the “ordeal”.
The crumb was slightly dense, as it should be for any good pound cake, and yet incredibly soft and fluffy. As with all the other Medrich recipes I’ve ever tried, the texture was wonderfully refined and smooth…
The only tell-tale sign of the cake’s “oven experience” was the slightly too thick top crust…
But you know what, the Kho family is a family of cake crust lovers. Truly. It turned out that those thick, crispy, golden brown crusts were the bits people started fighting over!
The only other thing I wasn’t overly enthusiastic about was the uneven coloring of the cake…
But that was wholly (I suspect) due to the silicone bundt mould that I was given to use. I think a traditional metal bundt pan would have worked much better, and would have given the cake an all-round golden brown tan.
Personally, I found the cake just a tad on the sweet side. But everyone else, without exception, thought the cake was just right. Maybe at that stage, I had already breached my sugar quota for the week, and my body was just a little more sensitive to sweetness. I also felt that the vanilla notes were just a touch obvious; perhaps a reduced amount of just one, or even three quarter, teaspoon would be better.
Overall, I really liked the recipe. This was one of the nicest smelling cake batters I have made; even when I was mixing it up, the smells were tantalizingly good, in a warm, fuzzy sort of way. As it baked, the aromas that wafted from the oven were nicely buttery, vanilla-y and all warm and comforting. It smelt just like a regular pound cake; but without the pound (literally) of butter that went into the traditional pound cake (and thus its name). Compared to the usual 2 cups or so of butter in the “normal” version, this one had only 5 tablespoons! And yet it had all the flavor and fragrance of buttery goodness.
This recipe was not only a doddle to make, but was also one that was highly amenable to variation… but more on that tomorrow.
Buttermilk Pound Cake
[from Alice Medrich’s Chocolate and the Art of Low Fat Desserts]
1½ cups (6 oz) all-purpose flour
¼ teaspoon baking powder
¼ teaspoon baking soda
3/8 teaspoon salt
1 egg
2 egg whites
1¼ teaspoons vanilla extract
½ cup low fat buttermilk
5 tablespoons (75g) unsalted butter
1 cup sugar
• Have all ingredients at room temperature.
• Preheat oven to 160C or 325F.
• Whisk to combine flour, baking powder, baking soda and salt. Sift together (I do it twice). Set aside.
• In a small bowl, whisk together the egg and egg whites. Set aside.
• Combine the vanilla and buttermilk. Set aside.
• Cut the butter into chunks and place into the mixer bowl. Beat to soften – about one minute.
• Add the sugar gradually; beating constantly until light and fluffy (about 3 minutes).
• Gradually dribble in the beaten eggs, and beat at medium-high speed for about 2-3 minutes, until light and creamy. Scrape down bowl as necessary.
• Reduce mixer speed to low, and add a third of the flour mixture. Beat to combine; scraping bowl with rubber spatula as necessary.
• Dribble in half of the buttermilk. Mix well on medium-high speed.
• Add half of the remaining flour mixture. Mix on low speed.
• On medium-high speed, pour in the rest of the buttermilk.
• Finally, on low speed, add the remaining flour, and mix until well combined.
• Pour batter into either a 5-6 cup bundt or tube pan or a 5 cup loaf pan.
• Bake in the lower third of the oven for about 35-40 minutes (for the bundt pan) and 65-70 minutes for the loaf pan; or until the cake starts to pull away from the sides of the pan, the top is golden brown and a skewer inserted into the center comes out clean.
• Let cool for 10-15 minutes before unmoulding.
This cake is great as is, eaten with a steaming mug of coffee, tea or hot chocolate. However, we all know how really, truly good all pound cakes are when topped with whipped cream and some fresh berries (any berries really: blueberries, strawberries, raspberries…), or it doesn’t even have to be berries; try chunks of fresh, juicy, aromatic mangoes, luscious peaches, or even succulent persimmons. Alternatively, keep it easy… just scoop a dollop of chunky preserves over the whipped cream. How about a slice of delightfully fluffy pound cake paired with a generous scoop of smooth vanilla frozen yogurt (or ice cream if you prefer), with some warm, fudgy, rich chocolate sauce drizzled on top and a handful of toasted almond slices sprinkled over? Wouldn’t that be something? Or, if you are like me, a piece of pound cake spread quite simply with a cascade of Nutella… now, that is comfort food!
The cake was gone within minutes (I barely had time to snap some pictures – yes, it even occurred to me to take photos: a definite sign that I was starting to “return to normal”). Sure, part of the quick disappearing act was because the cake was rather delicious. But another part of it was because I had “forgotten” I was feeding a crowd.
Normally, at home, I only have to cook for between 2-5 persons on any given day. Occasionally I may throw a dinner party and cook for 10-12; but I usually get a few days (sometimes even a couple of weeks) to prepare for that sort of kitchen excursion. My brain just didn’t make the rapid enough switch around to cooking (or baking) for an entire clan…
You see, my paternal grandmother had 10 children; each of those offsprings went on to have at least 2, and up to 7, kids each. Most of those kids have now gone on to have at least 2-3 children of their own. Throw spouses and partners into the mix, and that makes for a lot of people to have under one roof! Even though we did not have the FULL clan in attendance, we were still talking a full house! Everything from sofa space to just a quiet corner to collect your thoughts were at a premium.
Even my attempt to “escape” to the kitchen for a little more “peace and quiet” was in vain. It was not a very big kitchen, and at any one time there were 10-15 people crammed into the space, with just as many different culinary activities going on all at the same time! It was only the camaderie that one finds in the fold of family that stopped everything from tipping over into unbridled madness.
Anyway, silly me forgot about the numbers game. I made but one batch of the cake. Even though we managed to get about 22-23 decent slices out of the cake, it still meant that a large proportion of the family went without. Let’s just say there’s nothing quite like a freshly baked, still-warm, tantalizingly aromatic cake - and insufficient quantities of it – to trigger a mad scramble and to almost start a food fight!
So, I promised to make more pound cake the next day. And I did – tweaking the recipe for a different taste along the way. But that story is for tomorrow…
Copyright © 2004 Renee Kho. All Rights Reserved.
Please contact me for permission to copy, publish, distribute or display any of the images or text contained in this article.
12:02 PM in Home Baker: Lighten Up! Cakes | Permalink | Comments (19) | TrackBack
Sunday, August 15, 2025
So Good To Be Home!
Thank you all for the supportive wishes through the comments on this blog and via email. I’m very touched by your caring concern. Thank you.
To those who have written to ask after me, I’m doing okay; maybe a little tired physically and mentally and still a little drained emotionally, but otherwise okay. : ) Thanks for asking after me, and thanks for caring.
I can’t tell you how good it feels to be home… to sleep in my own bed again! The avalanche of paper that greeted me from my in-tray was a sight to behold; but nothing could dampen how happy I felt to be back. There’s time enough over the next few days to turn my attention to the backlog of work. Right now, I’m just savoring being home.
I’ve missed blogging… I’m hoping to be able to catch my breath and resurface from under that mound of paper in a few days, and to share some pics and tales with you...
12:56 AM in Crumbs & Tidbits | Permalink | Comments (26) | TrackBack